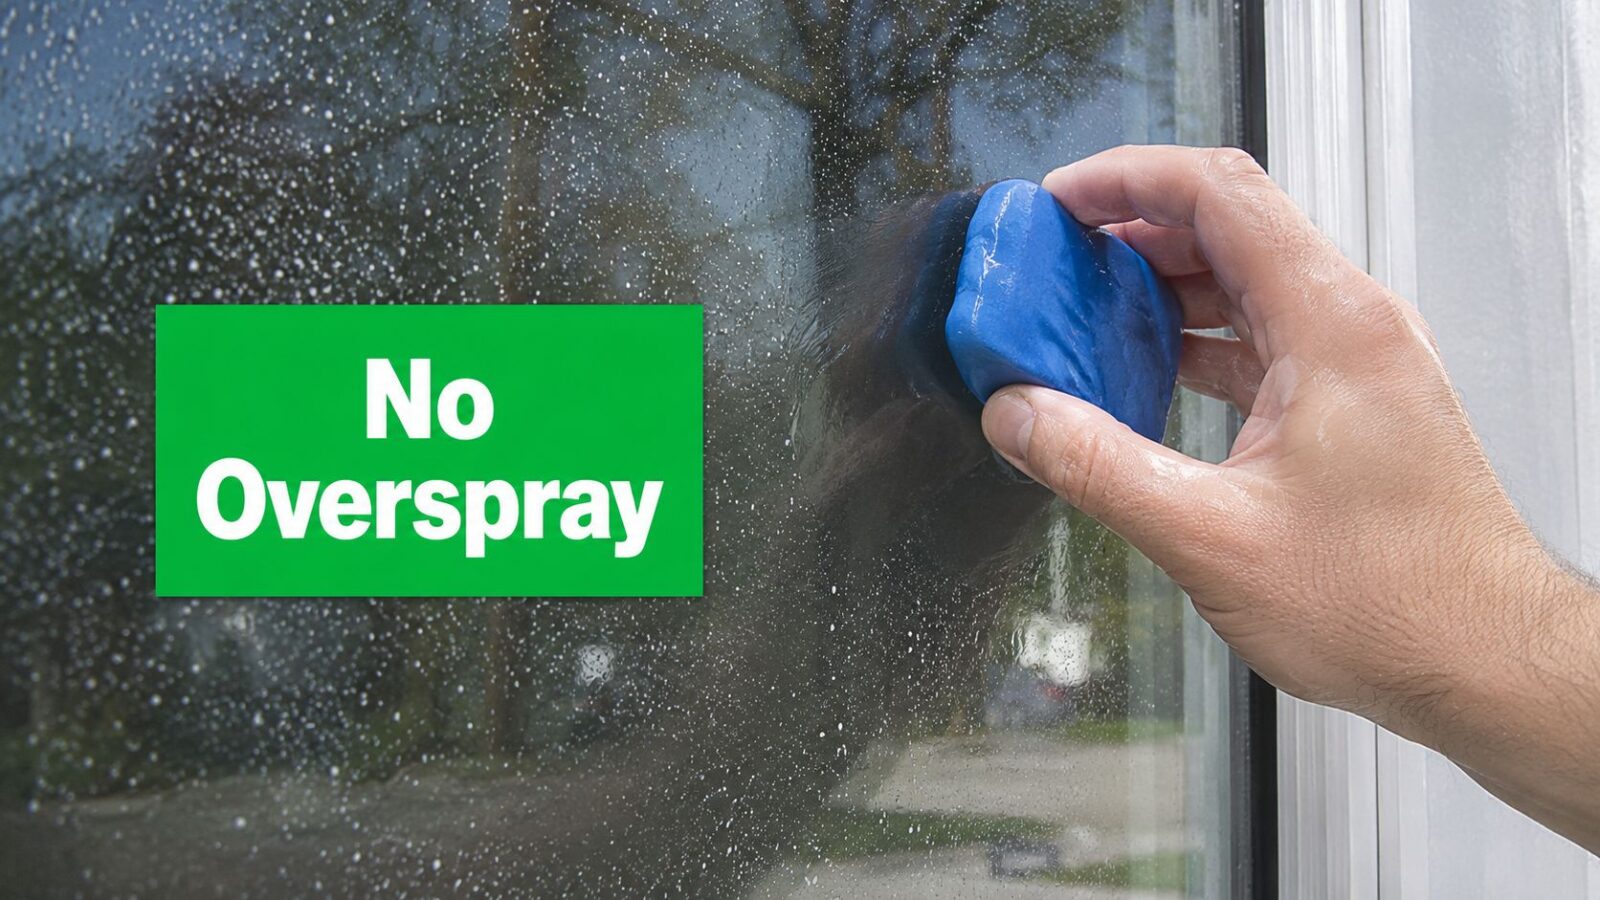
You finish a paint project, step back to admire the color, and then the afternoon sun hits the glass. Suddenly every window shows a fine mist of specks. From inside, it looks cloudy. From outside, it looks like the glass was sanded.
That's paint overspray, and it's one of the most common cleanup issues we see after interior repainting, exterior trim work, cabinet spraying, and post-construction touchups around Flagstaff homes. The frustrating part is that a lot of damage happens during cleanup, not during the painting itself.
Homeowners usually reach for whatever is nearby. A household spray cleaner, a rag, maybe a dry scraper. That's where small paint dots can turn into scratched panes, marked-up frames, damaged seals, or a ruined tint film. Removing overspray from glass is a technique job, not a force job.
We've been serving Northern Arizona since 1999, and we treat overspray removal the same way we treat every window service. Protect the home first. Match the method to the surface. Finish with professional tools so the glass looks clear, not just paint-free.
That Fresh Paint Smell and Those Annoying Specks
The usual scenario is simple. The painter did good work, the room looks fresh, and then someone opens the blinds and notices tiny white dots across the window. On dark evenings they're easy to miss. In Flagstaff sunlight, they show up fast.
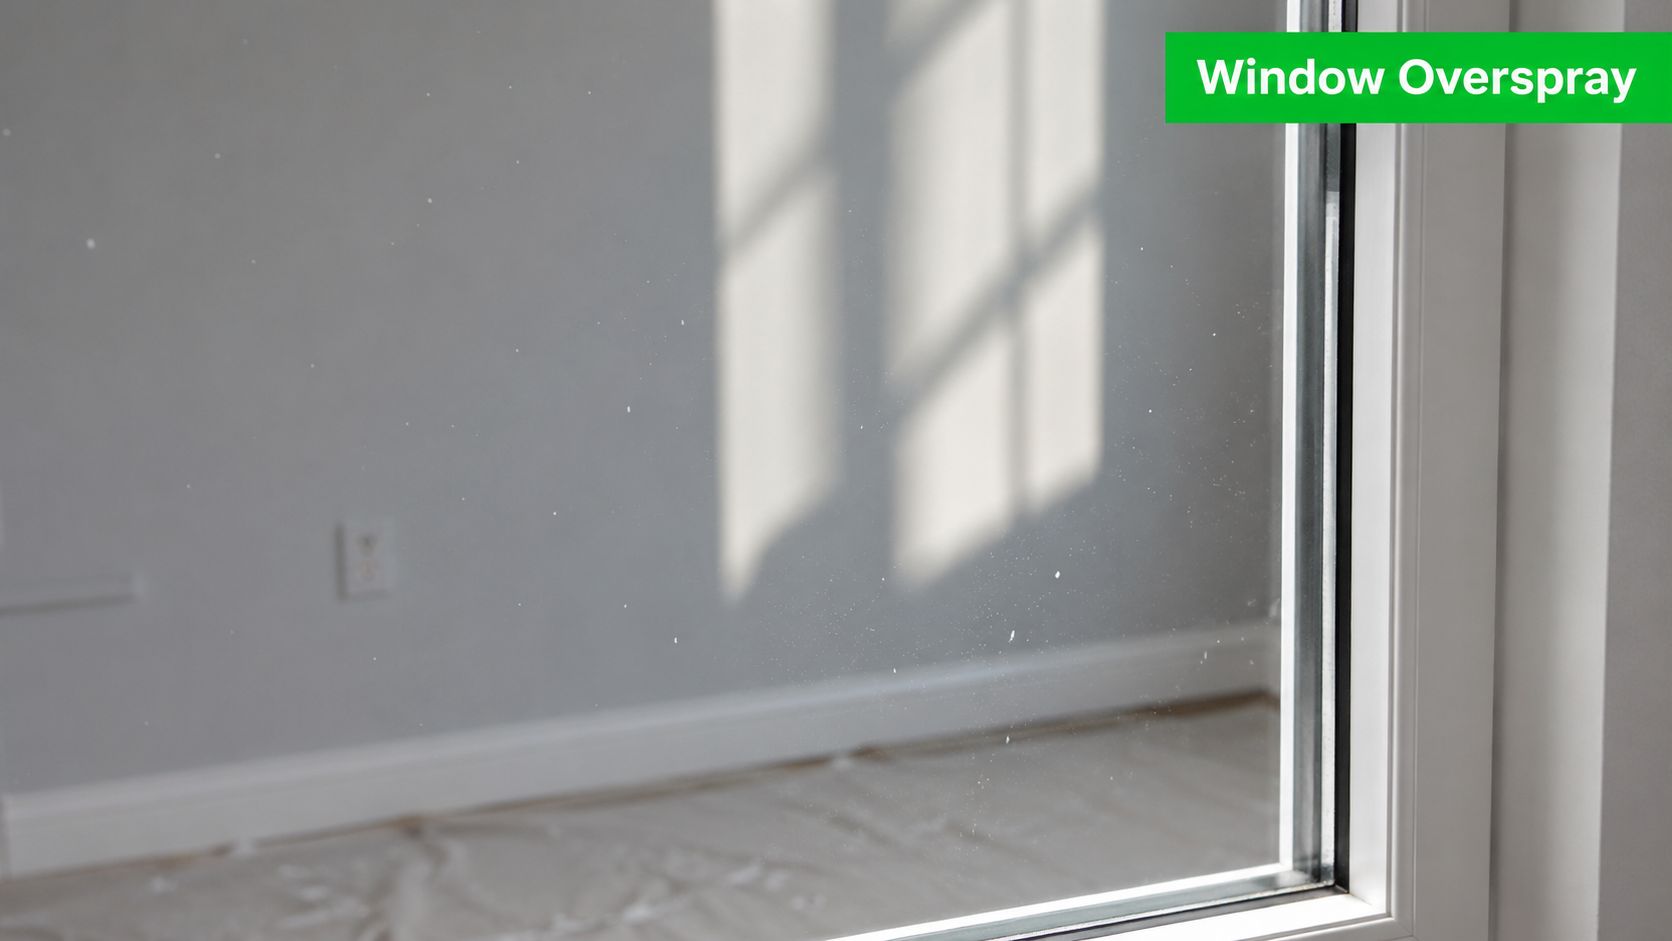
We see this after trim spraying, exterior siding work, remodel punch lists, and tenant turnover painting. Sometimes it's a light mist you can barely feel with your hand. Sometimes it's bonded hard enough that the glass feels rough and gritty.
Why people damage the glass during cleanup
The mistake usually happens in the first few minutes. Someone assumes glass is indestructible and starts scraping dry. Or they scrub aggressively and forget that the main risk isn't just the pane. It's the frame finish, the gasket, the surrounding paint, and any specialty coating on the unit.
Practical rule: If the method feels fast, harsh, and uncontrolled, it usually belongs nowhere near a finished window.
Professional window cleaners look at overspray differently. We're not trying to win a fight against the paint. We're trying to remove contamination while leaving the entire window system intact.
The goal is clear glass without collateral damage
That means slowing down long enough to answer a few basic questions first. What kind of paint is it likely to be. How long has it been there. Is the glass standard, tinted, or coated. Is the overspray isolated to the glass, or has it drifted onto frames and seals too.
Those answers determine the method. They also determine whether a homeowner should proceed at all.
Assess the Paint and Window Type First
Overspray removal starts with identification. If you guess wrong on the paint or the glass, you can turn a cleanup job into scratched panes, damaged tint, or stained frames.
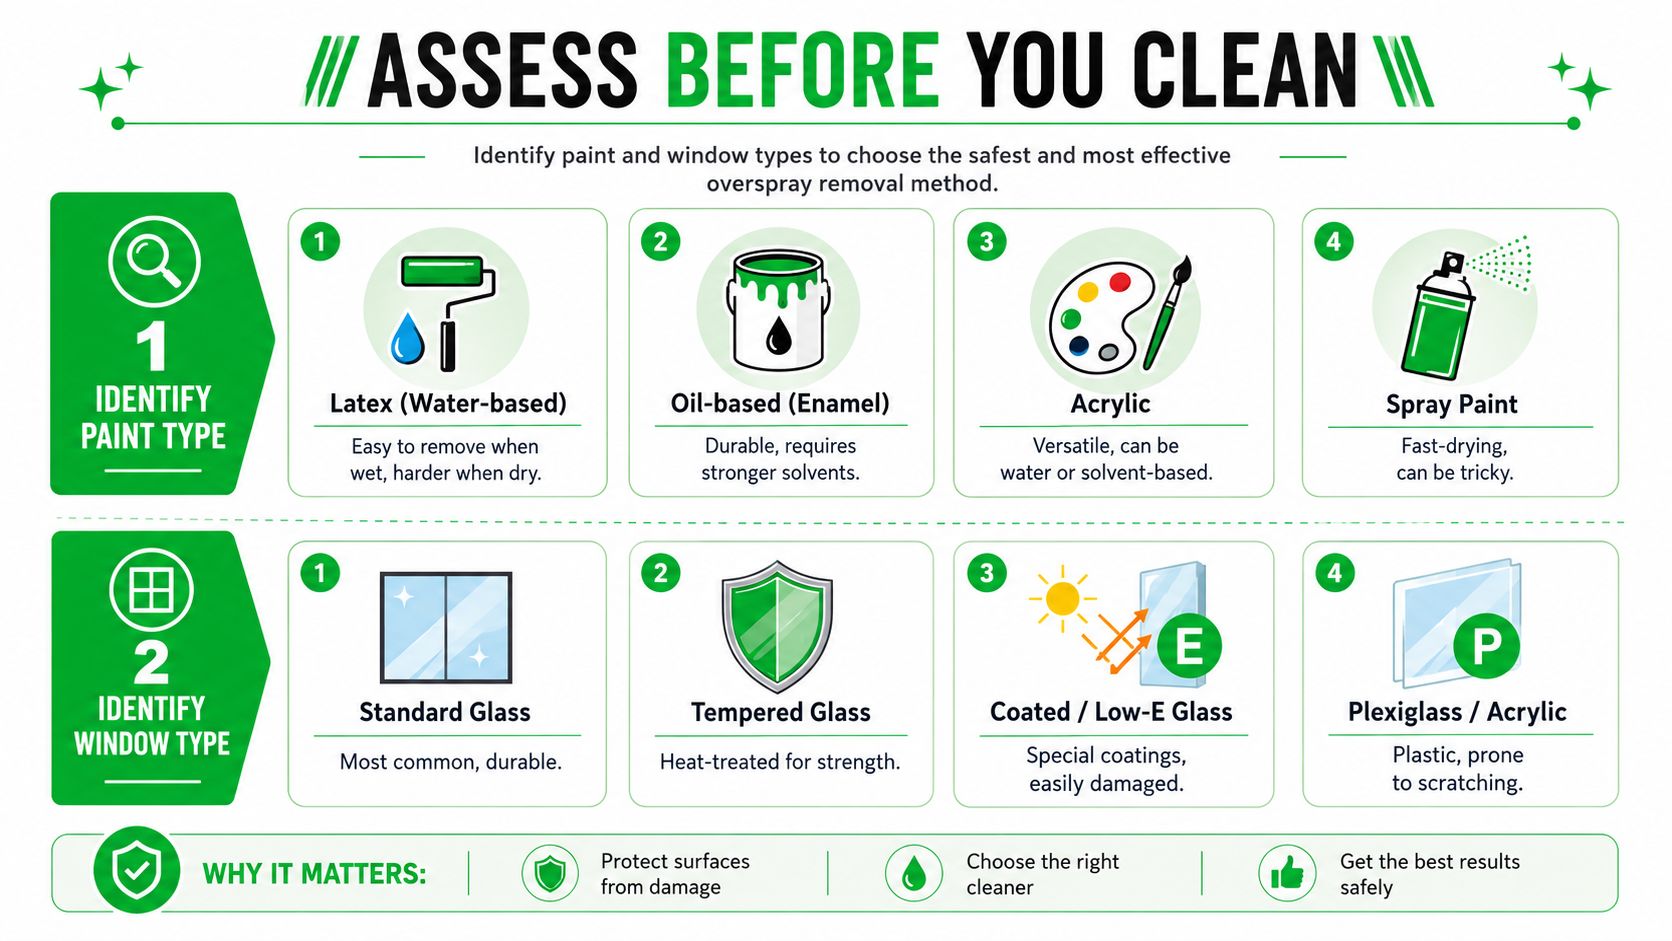
Start with the paint itself
Fresh paint and cured paint call for different handling. A light latex mist from recent interior work may release with patience and proper lubrication. Paint that has baked on through Flagstaff sun, dust, and weather usually holds tighter and needs a more controlled approach.
If you know what was sprayed, that narrows the risk right away. If you do not, sort it into broad categories first:
- Latex paint often responds better while it is still relatively fresh.
- Oil-based coatings tend to resist mild cleanup and can tempt people into using the wrong solvent too early.
- Fine spray finishes can leave a rough, even layer across large areas of glass, which makes spot-cleaning harder.
Age matters as much as paint type. The longer overspray sits, the more likely it is to bond and the more careful you need to be around surrounding materials.
Then identify the window
Many DIY articles fall short on the window side of the equation. They treat glass like a single surface. In the field, we do not get that luxury.
Standard annealed glass gives you more room for correction. Tinted glass, aftermarket film, low-E surfaces, and specialty coatings do not. Some windows can also have fabrication debris or pre-existing scratches that make razor work riskier than a homeowner expects.
That is why I tell clients to inspect the whole window unit, not just the pane. Look at the frame finish, corner seals, glazing gasket, and nearby trim before you touch anything. Overspray rarely lands on glass alone, and a sloppy cleanup can do more damage to vinyl, powder-coated frames, or sealants than to the paint itself.
A practical rule applies here. If you are unsure what kind of glass you have, treat it like a higher-risk surface until proven otherwise.
A professional window-cleaning source warns against using acetone on tinted windows and recommends softening the paint before wiping it away with care rather than forcing removal with aggressive scraping in its guidance on removing paint from glass safely.
Quick field checklist
Before touching the pane, check these points:
| Question | Why it matters |
|---|---|
| Is the overspray fresh or cured | Fresh residue often releases with milder methods |
| Is the glass tinted, filmed, or coated | Some solvents and blades can permanently damage the surface |
| Did overspray hit frames, seals, or trim | Cleanup method has to protect the whole window assembly |
| Can you test a small corner first | A test spot shows how the paint responds before damage becomes visible |
If you are building a safe setup before testing a small area, use the same kind of professional home window cleaning tools that keep the glass wet, controlled, and easy to inspect. That matters far more than speed.
Good results come from diagnosis first. Scraping first is how homeowners end up calling us to fix the cleanup.
Start with the Least Aggressive Method
A lot of window damage happens during cleanup, not during painting.
The safe starting point is simple. Keep the glass wet, use light mechanical removal first, and inspect often. Homeowners get into trouble when they reach for Windex, a paper towel, or a dry razor because the specks look minor. On the glass itself, that approach can leave scratch lines. Around the glass, it can stain frames, catch an edge of sealant, or leave chemical residue in corners that is hard to remove cleanly.
Start with lubrication and controlled contact
For light overspray on standard glass, I start by flooding the pane with proper lubricant, not a household spray cleaner. The goal is to let the contamination release while the surface stays slick and visible. A clay bar can work well here if you use straight, overlapping passes and very light pressure.
If the bar starts to drag, stop and add more slip. Dragging is how people grind debris across the pane.
This is also where professional setup matters. A clean applicator, quality microfiber, and a real squeegee leave the glass clear enough to inspect between passes. If you want to see the difference between homeowner supplies and the tools we use on residential glass, this guide to home window cleaning tools is a solid reference.
A practical process for light overspray
Use this order:
- Wet the full pane generously so no area is worked dry.
- Test a small corner first to see whether the paint releases with light effort.
- Glide a clay bar in straight lines with light pressure.
- Wipe and inspect with a clean microfiber towel after each small section.
- Finish with standard window-cleaning technique so you remove residue instead of smearing it around.
That slower approach protects more than the glass. It also gives you a chance to catch paint sitting on the frame edge, gasket, or track before you spread it.
Common mistakes that create extra work
The biggest DIY mistake is dry scraping. The second is using glass cleaner as a lubricant. Windex and similar sprays are fine for routine fingerprints, but they are not designed to carry paint particles safely across a pane during removal.
I also see people scrubbing with whatever towel is nearby. That usually means lint, haze, and missed specks that only show up once the sun hits the window. On higher-value homes in Flagstaff, that kind of shortcut is not worth the risk.
For renovation-related messes, it also helps to find expert post-construction window cleaning so you can compare your situation to a proper cleanup standard before experimenting on your own glass.
How to Tackle Stubborn and Cured Paint
Cured paint is where homeowners often damage good glass. The specks feel small, so the temptation is to grab a razor, spray some household cleaner, and scrape until the pane looks clear. On the wrong window, that shortcut can leave scratches, edge damage, or problems with coatings that cost far more than the overspray itself.
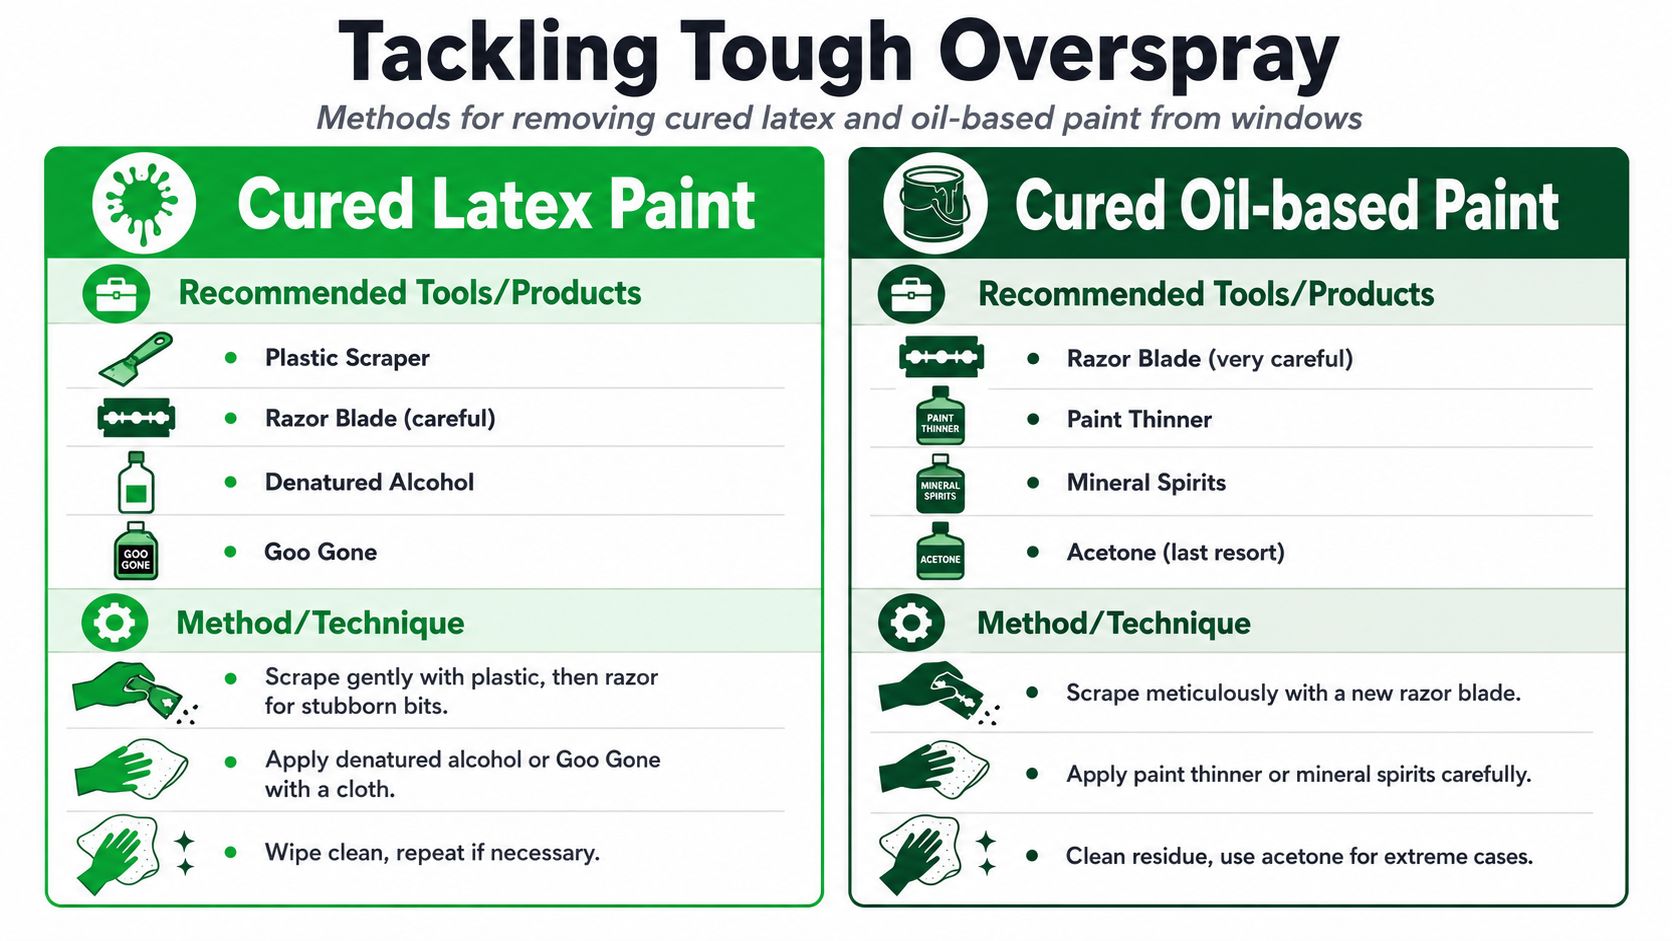
Start by treating cured paint as a surface-identification problem, not just a cleaning problem. Standard annealed glass gives you more options. Tempered glass, tinted panes, low-E coatings, and older windows with worn seals call for more caution. In Flagstaff, I also watch the frame material closely. Painted wood, vinyl, and metal-clad frames can be easier to scar than the glass itself if runoff or a slipping tool reaches the edge.
A safer escalation path for bonded paint
If the earlier clay-bar pass did not release the paint, the next step is controlled friction with plenty of lubrication. On some standard glass, very fine steel wool can break loose cured overspray without the digging action of a blade. The key is patience. Light pressure, straight-line motion, and constant lubrication matter more than force.
If that still does not move it, a new razor can be appropriate, but only on glass that is safe for blade work and only with disciplined technique. Professionals keep the blade flat, work in short straight passes, and stop at the first sign that the contamination is smearing, dragging, or resisting in an unusual way.
Here's the embedded demonstration if you want to see the kind of control professionals use:
Blade work has strict rules
A razor is a precision tool. It is not a general-purpose fix for every painted window.
- Flood the glass first: The blade should travel on lubrication, not chatter across a dry pane.
- Use a brand-new blade: Even a small defect in the edge can leave visible lines.
- Keep the blade flat to the glass: Raised corners are what score the surface.
- Work in short, straight passes: That gives you more control near edges and keeps pressure even.
- Stop before the frame line: Paint on the frame, gasket, or seal gets a different method.
I never use household glass cleaner as the working fluid for this step. Professional slip solution gives the blade a smoother path and carries loosened paint away from the edge. That is one of the biggest differences between a proper window cleaning method and the DIY habit of spraying Windex and hoping for the best.
Solvents can help, but they create new risks
Some cured residue softens with the right solvent. That can save time on standard glass, especially after repainting or exterior construction. It can also stain finishes, affect sealants, or leave cleanup problems around sashes and trim if it is handled carelessly.
That is why pros isolate the area first, test in a small spot, and protect the surrounding materials before applying anything stronger than soap and water. Homeowners who value the condition of the whole window, not just the pane, should treat solvent use carefully. The same principle applies in how to remove hard water stains from windows. Surface chemistry matters, and aggressive products are rarely the first answer.
For remodels, repaints, and job sites with multiple types of debris, it can help to find expert post-construction window cleaning before you start mixing methods on your own glass.
When cured paint should stop being a DIY job
Call a professional if any of these apply:
- You are not sure whether the glass has tint, film, or a specialty coating
- The overspray sits tight against frame edges, seals, or divided-light grids
- You need ladder work on upper-story windows
- A first scraping attempt already left haze, drag marks, or visible lines
- The home has higher-end windows where replacement cost makes experimentation a bad bet
That is usually the cutoff point. At that stage, the goal is no longer just getting paint off. The goal is getting it off without turning a cleanup problem into glass restoration or frame repair.
The Professional Finish Protecting Your Home
Getting the paint off is only part of the work. A professional result means the whole window area gets attention, not just the specks on the glass.
We protect what surrounds the pane
Frames, tracks, seals, sills, and nearby walls matter. Solvents can migrate. Blades can slip. Even a safe method on glass becomes a bad method if it scars the frame or stains adjacent materials.
That's why pros isolate the work area, control runoff, and slow down at edges. The homeowner sees clean glass. Quality shows up in what wasn't damaged along the way.
Screens and final detailing matter too
With every service, we remove screens, clean screens, and reinstall them. That's part of caring for the home properly. If the screen is dusty, the track is loaded, or paint residue is still sitting in the corners, the job never looks complete.
After overspray removal, the final clean should leave the pane clear and residue-free. We use squeegees, extension poles, ladders, and pure-water brushes where appropriate because those tools finish glass. They don't just push soil around.
Clean glass should look invisible. If you can see haze, residue, lint, or tool marks, the work isn't finished.
This is also where the difference between professional service and casual DIY really shows. The goal isn't merely “paint removed.” The goal is a window that looks right in morning light, late sun, and from every angle inside the room.
When to Call Flagstaff's Window Cleaning Experts
A few light specks on an easy ground-floor pane might be manageable. A whole home with cured overspray, ladder access, mixed window types, and repaint residue on frames is a different category of work.

The risk goes up fast
If the window is high, tinted, coated, or part of a recent remodel, it's smart to pause before trying random internet advice. The costliest mistakes usually come from the same pattern: too much pressure, too little lubrication, or the wrong chemical on the wrong surface.
Professional crews bring more than labor. They bring process, insurance, access equipment, and the judgment to know when to stop escalating. That matters on cabins, custom homes, storefronts, hotels, and post-construction projects where one bad pass can leave permanent evidence.
Why local experience matters in Flagstaff
Flagstaff homes often have a mix of window styles, elevations, and sun exposure. We've been serving Northern Arizona since 1999, and that local experience matters when you're working on everything from residential glass to large post-construction cleanup.
Founded by Flagstaff native David Kaminski, our team has grown to handle work that ranges from single-family homes to large commercial properties. We use in-house equipment including ladders, poles, and lifts for difficult access, and we're used to protecting homes where owners care a great deal about finishes, views, and long-term condition.
If your windows need overspray removal after painting or construction, it's worth looking at our post-construction window cleaning service to see how that work is handled professionally.
If you'd rather not gamble with blades, solvents, or specialty glass, contact Pine Country Window Cleaning. We'll help you restore clear windows while protecting your frames, screens, and the rest of your home the way it should be done.