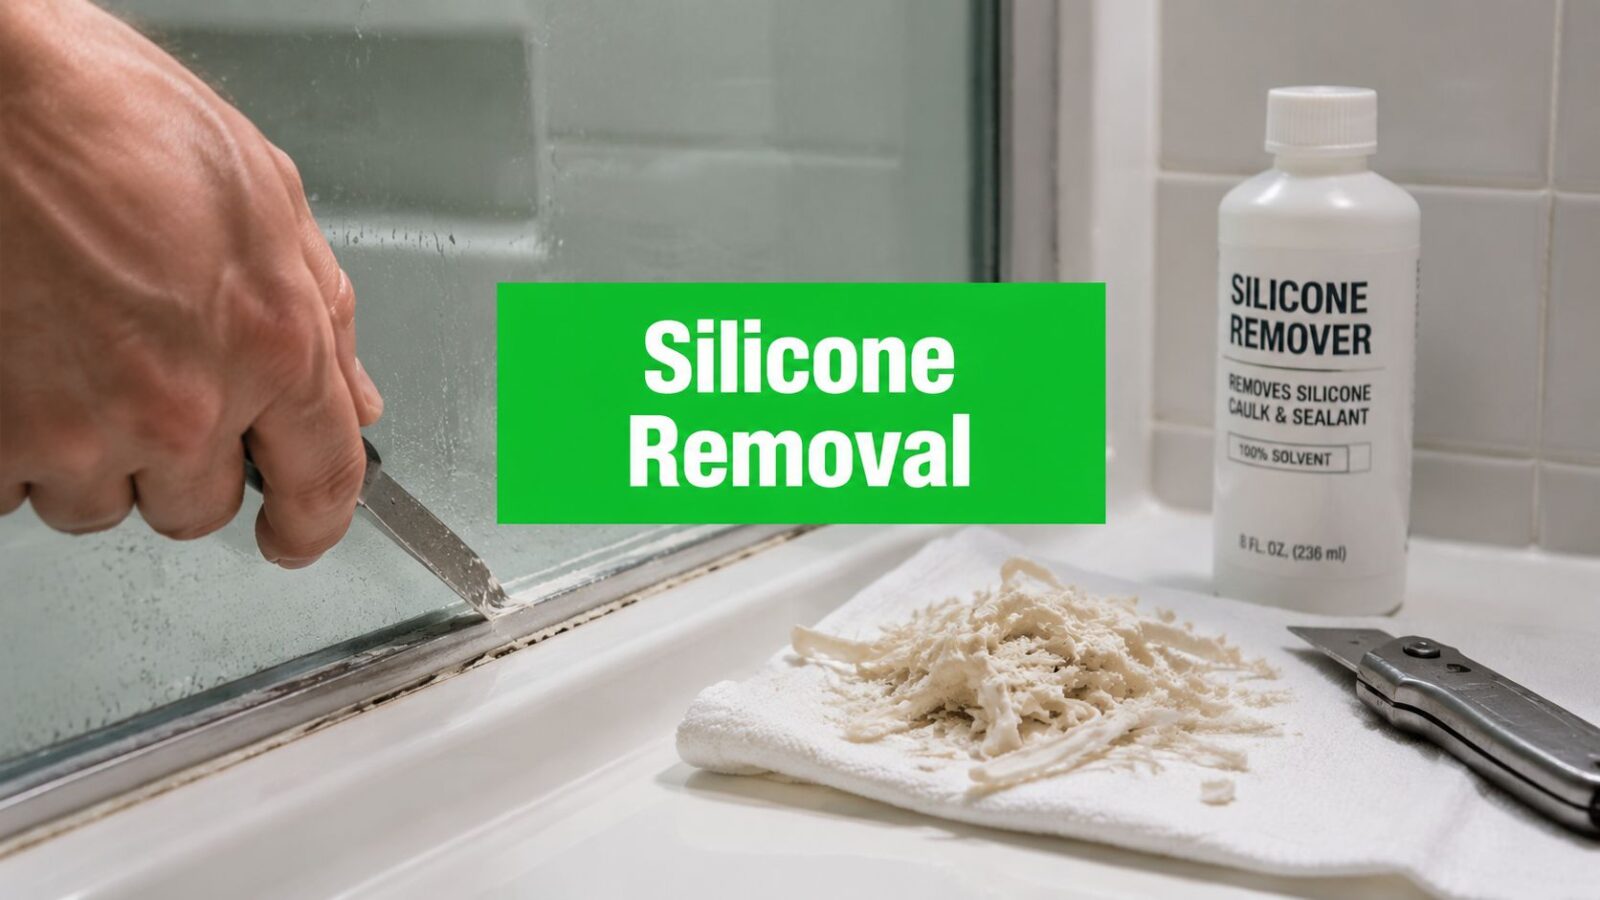
You're probably dealing with one of two jobs right now. Somebody cut out old sealant and left a greasy, rubbery film on the glass, or a silicone bead failed and now the residue won't let go no matter how much you wipe at it.
That's the part that frustrates people. Silicone is built to resist water, so water-based cleaners don't dissolve it. Proper silicone removal from glass requires mechanical abrasion combined with a solvent to break the polymer bond, because silicone doesn't dissolve in ordinary water-based cleaners, and trying to clean over it first usually leaves streaking and smeared residue, as noted by Pine Country Window Cleaning.
In Flagstaff, I've seen this on shower glass, view windows, patio doors, remodel punch lists, and post-construction cleanup. The pattern is always the same. A homeowner starts with a paper towel, a household spray, and a lot of optimism. Then the residue spreads, grabs dust, and turns a clean pane into a cloudy mess.
Professional window cleaners don't solve that with a rag, Windex, or newspaper. We solve it with the right blade, the right angle, the right solvent, and patience. We also solve it without beating up the glass, the frame, or the customer's home. That matters. Good work isn't just getting silicone off. It's protecting the finish around it, keeping debris contained, and leaving the area cleaner than we found it.
That Stubborn Smear a Homeowner's Nightmare
The nightmare usually starts small. A thin clear line at the edge of a pane. A leftover smear on a shower door. A fat bead on glass from an old repair that looked easy enough to remove until the first scrape just stretched it around.
Silicone has a way of making people think they're close when they're not. The bulk comes off, but the film stays. Then sunlight hits the glass sideways, and every missed streak lights up.
Why ordinary cleaning makes it worse
A lot of online advice still treats silicone like common grime. It isn't. If you spray a water-based cleaner on silicone residue before you've broken that bond mechanically and chemically, you usually get drag marks and haze instead of clean glass.
Field rule: If the residue feels rubbery or greasy under a blade, stop trying to wash it off. Cut it loose first.
That's why pros approach silicone removal from glass as a surface restoration job, not routine window cleaning. You're not just washing dirt. You're removing a bonded contaminant without scratching the pane.
What homeowners are usually up against
Most problem jobs fall into a few buckets:
- Old cured sealant that clings in a thin film after the bead is gone
- Botched remodel cleanup where silicone touched finished glass during installation
- Shower door residue that sits next to metal, tile, stone, or coatings
- Window edge contamination where scraping too aggressively can scar the frame or gasket
The challenge isn't just removal. It's removal without creating a bigger problem.
In mountain homes and cabins around Flagstaff, that matters even more. Big glass packages, direct sun, cold-weather expansion, and upgraded coatings all raise the stakes. One bad scraping session can leave permanent damage that's harder to live with than the original silicone.
Assess Your Glass and Gather Your Tools
Pros don't start by scraping. They start by identifying what they're touching.
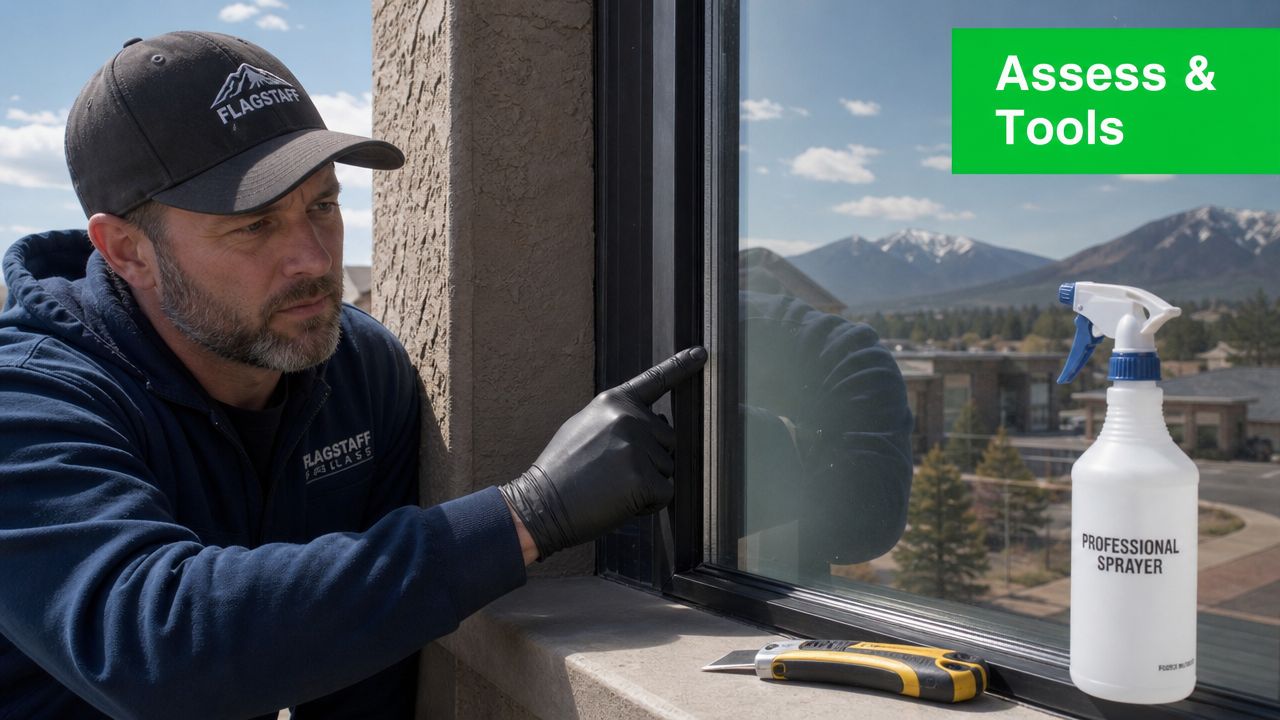
Fresh silicone behaves differently than cured silicone. Fresh material can stretch and roll. Fully cured material tends to shear, then leave a film. That changes how much cutting, heat, and solvent you'll need.
Check the glass before you choose a method
Most DIY guides fall behind because modern glass isn't always bare, forgiving glass.
The misapplication of quad-zero steel wool and other abrasives on tempered or coated glass is a growing issue because it can micro-abrade protective coatings on modern shower glass and low-E panes, leading to irreversible haze that can void warranties, as discussed in this YouTube caution on abrasive use.
If you've got upgraded outdoor enclosures, this matters even more. Homeowners researching specialty installations often focus on design and weather exposure, but resources on Tampa Bay glass porch enclosures also remind people how many enclosure systems rely on specialty glass and surface finishes that need a gentler maintenance mindset.
The basic pro kit
A clean result starts with the right tools, not just more force. A solid setup usually includes the following:
- Sharp utility knife for scoring both edges of the bead before lifting
- Professional 1-inch scraper blades with clean, undamaged edges
- Plastic scraper or silicone removal tool for more delicate areas
- Microfiber towels for controlled wipe-down and residue pickup
- Isopropyl alcohol or a compatible remover for the chemical side
- Gloves and ventilation when solvents enter the job
- A way to identify specialty glass before using anything abrasive
If you want a good overview of the kind of gear pros use around windows in general, Pine Country's page on home window cleaning tools gives a useful baseline.
What to leave out of the kit
Some tools create more damage than progress.
| Tool or habit | Why it backfires |
|---|---|
| Cheap chipped blades | They catch, skip, and leave uneven scrape lines |
| Dry scraping | It encourages smearing and raises scratch risk |
| Abrasive pads on coated glass | They can mark the coating permanently |
| Guessing on solvents | Frames, paint, and finishes can react badly |
Coated glass changes the whole job. What worked on an old shower panel can ruin a newer one.
The Art of Mechanical Silicone Removal
Mechanical removal is careful work. It's not a race, and it's definitely not brute force.
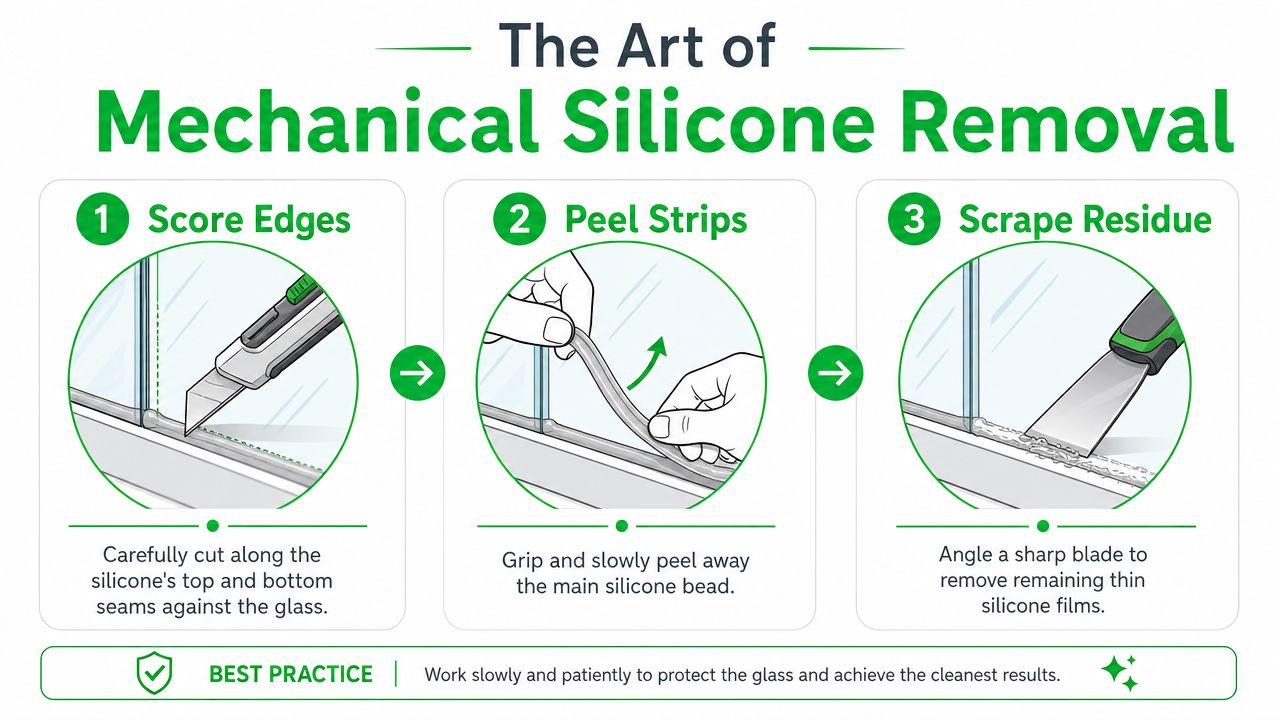
The first move is to score both edges of the silicone bead to break the bond where it meets the glass and adjoining surface. After that, controlled heat at 60 to 80°C for 2 to 3 minutes can make the sealant pliable before peeling the main body away. Forcing it while cold increases smearing, according to this guide on how to remove silicone sealant.
Start with separation, not scraping
A good sequence looks like this:
Score the top edge
Cut along the seam where the silicone meets the glass. Go deep enough to break the bond, but don't dig into the frame.Score the bottom edge
Free the opposite side so the bead can release instead of tearing in place.Warm the section
Gentle heat helps. Keep it controlled and localized.Peel the body
Pull the loosened bead slowly while it's still pliable.
The goal is to remove as much bulk as possible before you ever start chasing the film.
Here's a short demonstration that matches the basic blade-first approach:
Follow the wet-glass rule
Once the bead is gone, you're left with the tricky part. The thin, smeary residue.
Technical benchmarks discussed in a window cleaning forum thread stress the wet-glass rule. Blades should run on a continuously wet surface to prevent smearing. That same discussion notes that dry blades increase smearing incidents by over 60%, and blade-only methods are much less effective on thin residue unless they're followed by 91% isopropyl alcohol and a melamine sponge.
Practical rule: If the blade starts chattering, dragging, or bunching residue, add lubrication and reset your angle.
Blade angle matters more than pressure
Hold the scraper low and flat. Let the edge shave the residue rather than dig at it. Short strokes beat long heroic passes, especially near corners and frame edges.
For related blade control on another stubborn glass contaminant, Pine Country's guide on how to remove paint overspray from windows is worth a read. The hand discipline is very similar.
A few habits separate clean work from scratched work:
- Change blades early when they start to lose that crisp feel
- Work small sections so residue doesn't cool, smear, and reattach
- Keep debris off the blade edge because trapped material can scratch
- Stop at coatings or uncertainty instead of pushing your luck
Dissolving Stubborn Residue with Solvents
Once the heavy silicone is gone, the remaining film often needs chemistry. At this stage, people either get professional results or damage trim, frames, and finishes by rushing.
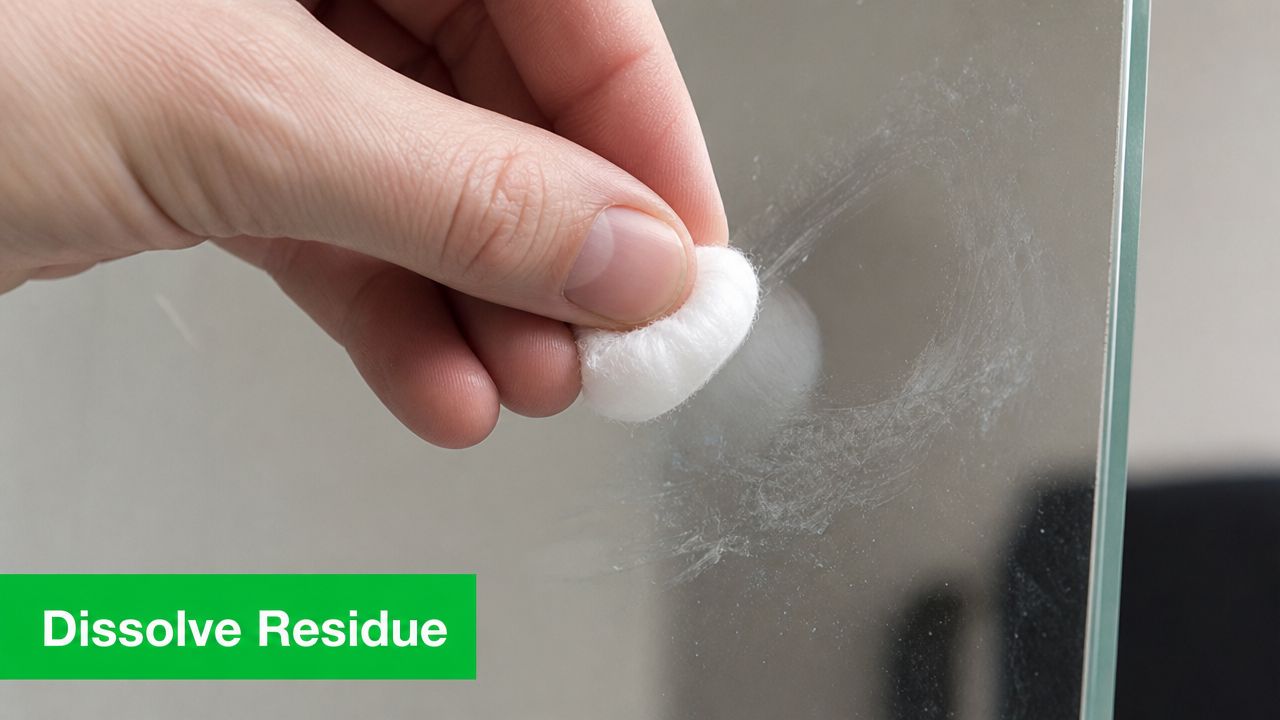
For non-porous surfaces like glass, isopropyl alcohol can be left to absorb for 15 to 60 minutes, and it should always be tested first in an inconspicuous spot to rule out staining or damage, according to GE Sealants' article on the right way to remove silicone sealant during a remodel.
Dwell time does the work
The biggest mistake with solvents is impatience. People wipe them on and wipe them right back off.
That doesn't give the product time to soften the residue. The solvent needs contact time so it can creep into the film and weaken what's left after scraping. On glass, that usually means applying it carefully, letting it sit within the safe dwell window, and then returning with a plastic scraper, microfiber, or controlled blade pass.
Use solvent like a technician, not like a cleaner
A safe process looks like this:
- Test first near frames, paint, and adjoining finishes
- Ventilate the area before applying any solvent
- Apply only where needed instead of flooding the whole pane
- Let it dwell within the compatible time range
- Lift softened residue gently rather than grinding it around
Heat can also help with stubborn spots. A hair dryer on low heat is often enough to soften residue without getting reckless. The danger comes when someone overheats the area, especially near vinyl, gaskets, paint, or insulated glass edges.
If you're dealing with specialty coatings on other transparent surfaces, there's useful crossover thinking in this APEX NANO coating removal advice from APEX NANO – Titan Coatings. Different surface, same lesson. Respect the coating before you chase the residue.
Solvent is a second-stage tool. If the bulk silicone is still sitting there, cut and lift that first.
Achieving a Professional Finish and Final Cleanup
Getting the silicone off the glass is only part of the job. The finish is what tells you whether the work was done by a pro or by somebody who got tired halfway through.
A pane can look clean straight on and still be wrong. Turn to the side, catch reflected light, and the hidden film shows up. That's why final cleanup has to do more than remove visible mess. It has to remove what the next bead of sealant or the next cleaning pass will react to.
The invisible film that causes callbacks
One of the most missed steps in silicone removal from glass is post-removal chemical degreasing. A final wipe with isopropyl alcohol or methylated spirits removes the invisible film that can cause new silicone to fail because the fresh bead can't bond correctly to a compromised surface, as explained in JRacenstein's advice on removing silicone from glass.
That's the difference between “looks better” and “ready for resealing.”
If new silicone is going back in, this is not optional.
What a pro finish looks like
A professional finish usually includes these final steps:
- Degrease the glass after scraping and solvent work are complete
- Wipe residue into control towels instead of spreading it around the room
- Check the pane from multiple angles in natural and reflected light
- Clean the surrounding area so no crumbs or strings of old silicone remain
- Dispose of removed material carefully in a sealed bag if needed under local rules
After the glass is residue-free, the finishing clean should be done with professional window-cleaning methods. That means a proper solution, a scrubber, and a squeegee for a clean, controlled finish. It also means protecting floors, counters, and nearby trim while you work.
For homeowners maintaining shower enclosures after the repair is done, this guide for Naples shower door care is a helpful companion because ongoing care affects how quickly residue and hard-water issues come back.
Care for the home matters here
Silicone jobs get messy fast. Little strips drop into tracks, onto tile, and across sills. Solvent drips can travel. Old sealant can carry grime and mildew with it.
The right finish includes housekeeping. Keep blades controlled, catch debris as you go, and leave the area better than you found it. That's not extra. That's part of professional work.
Why Flagstaff Homeowners Trust the Professionals
There's a point where a silicone job stops being a Saturday project and starts becoming expensive risk.
That usually happens when the glass is tall, tempered, coated, hard to reach, or surrounded by surfaces that are easier to damage than the silicone itself. A shaky hand with a blade can scar glass. A dry pass can smear residue across the pane. The wrong abrasive can haze a modern coating.
When it makes sense to stop
Call for help if any of these apply:
- The glass may be coated or low-E and you're not sure what's safe
- The residue sits near expensive trim or finished stone
- You need ladder work on large exterior panes or second-story windows
- The silicone is part of a remodel or post-construction cleanup
- You've already tried and made it worse
That last one is common. Once residue has been smeared thinly over a larger area, cleanup gets more technical.

What professional help changes
In Flagstaff, homeowners often need more than a single-pane cleanup. They need a crew that knows residential glass, high windows, ladder safety, screens, and the difference between routine cleaning and restoration work.
Pine Country Window Cleaning is Flagstaff's largest window cleaning company, started by Flagstaff native David Kaminski, and it has been in business since 1999. The company uses the right equipment for real field conditions, including squeegees, ladders, poles, and pure-water brushes. It also removes screens, cleans screens, and reinstalls them with every service. Just as important, the team cares for customers and cares for their homes while the work is being done.
For remodels and builder punch lists, Pine Country's post-construction cleaning services are especially relevant because silicone residue often shows up alongside paint specks, dust, stickers, and other construction debris.
Good silicone removal protects the glass. Great service protects the whole home.
That's why many homeowners don't gamble with coated shower glass, view windows, or high exterior panes. They'd rather have the residue removed cleanly, the windows finished properly, the screens handled, and the house respected from start to finish.
If you want silicone residue removed without scratching the glass or risking damage to your home, contact Pine Country Window Cleaning. Since 1999, the team has helped Flagstaff homeowners and property managers with careful, professional window care, including difficult residue removal, screen service, and detailed cleanup that leaves the glass looking right and the home protected.