You pull into a Flagstaff campground with a Class A that looked clean when you left town. By the time you park beneath the ponderosas, the walls carry red dust, the front cap is speckled with bugs, and pine sap has started clinging to the decals. A quick hose rinse may improve the appearance, but it won't address what Northern Arizona's sun, dry air, road film, and freeze-thaw cycles are doing to the finish.
RV exterior cleaning is a preservation routine, not a cosmetic splash. It combines a controlled wash, surface-specific stain removal, careful drying, protection, and an inspection of seals, decals, roof edges, awnings, wheels, and undercarriage splash zones. Done correctly, the process protects gel-coat, painted panels, rubber, acrylic, and the seams that keep your home on wheels dry.
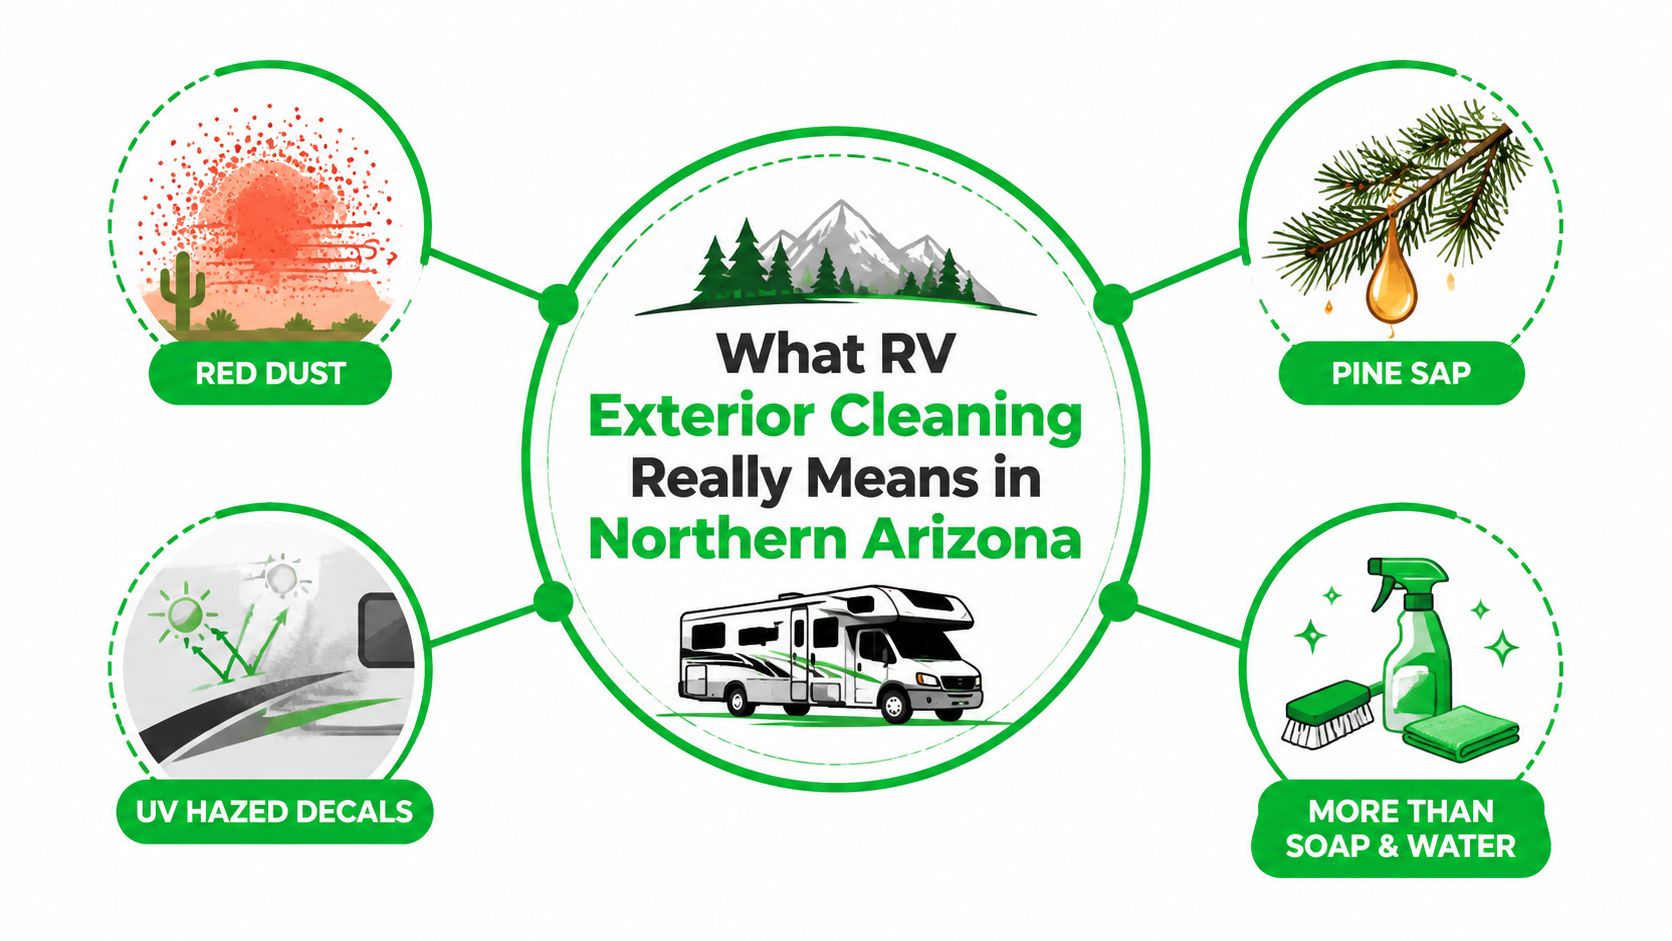
What RV Exterior Cleaning Really Means in Northern Arizona
A rig parked off I-40 near Flagstaff collects more than ordinary road grime. Ponderosa sap bonds to the surface, monsoon dust settles into trim and window channels, and strong sun gradually dulls decals and gel-coat. At this elevation, the combination of UV exposure, dry air, windblown grit, and rapid weather changes makes shortcuts expensive.
The right approach starts with identifying the surface. Fiberglass and gel-coat need mild chemistry and controlled agitation. Painted aluminum, vinyl graphics, acrylic windows, rubber seals, and roof membranes each tolerate different products and tools. Treating every exterior component as if it were automotive paint is how owners end up with faded graphics, swollen seals, or a finish that feels rough after washing.
Practical rule: Cleaning should leave the surface cleaner, not merely wetter. If the process grinds grit into the panel or leaves soap drying in the sun, it has created another problem.
Northern Arizona also changes the inspection part of the job. Residue around roof seams, window frames, marker lights, and slide-out edges can hide failing sealant. Freeze-thaw weather can stress those areas further, particularly when dirt and moisture remain trapped around a compromised joint. Regular exterior care makes defects easier to see before water intrusion turns into interior damage.
A maintenance routine, not a one-day makeover
Industry guidance commonly recommends washing an RV exterior every 4 to 6 weeks during camping season, with waxing typically performed two to four times per year, depending on use and storage conditions. A full detail is often handled once or twice a year, while bug, tar, and black-streak removal may be necessary after individual trips. Those intervals are outlined in RV detailing maintenance guidance.
The practical target is simple. Wash before contamination hardens, inspect while the surface is clean, and protect the finish before UV and weathering expose weak areas. That rhythm helps preserve appearance, resale appeal, and seal integrity without treating every wash as a restoration project.
Prep the Rig, Tools, and Site Before You Wash
Most finish damage happens before the first panel is washed. A poor site creates runoff problems, direct sun dries soap too quickly, and an unprotected decal or vent becomes vulnerable as soon as water and pressure arrive.
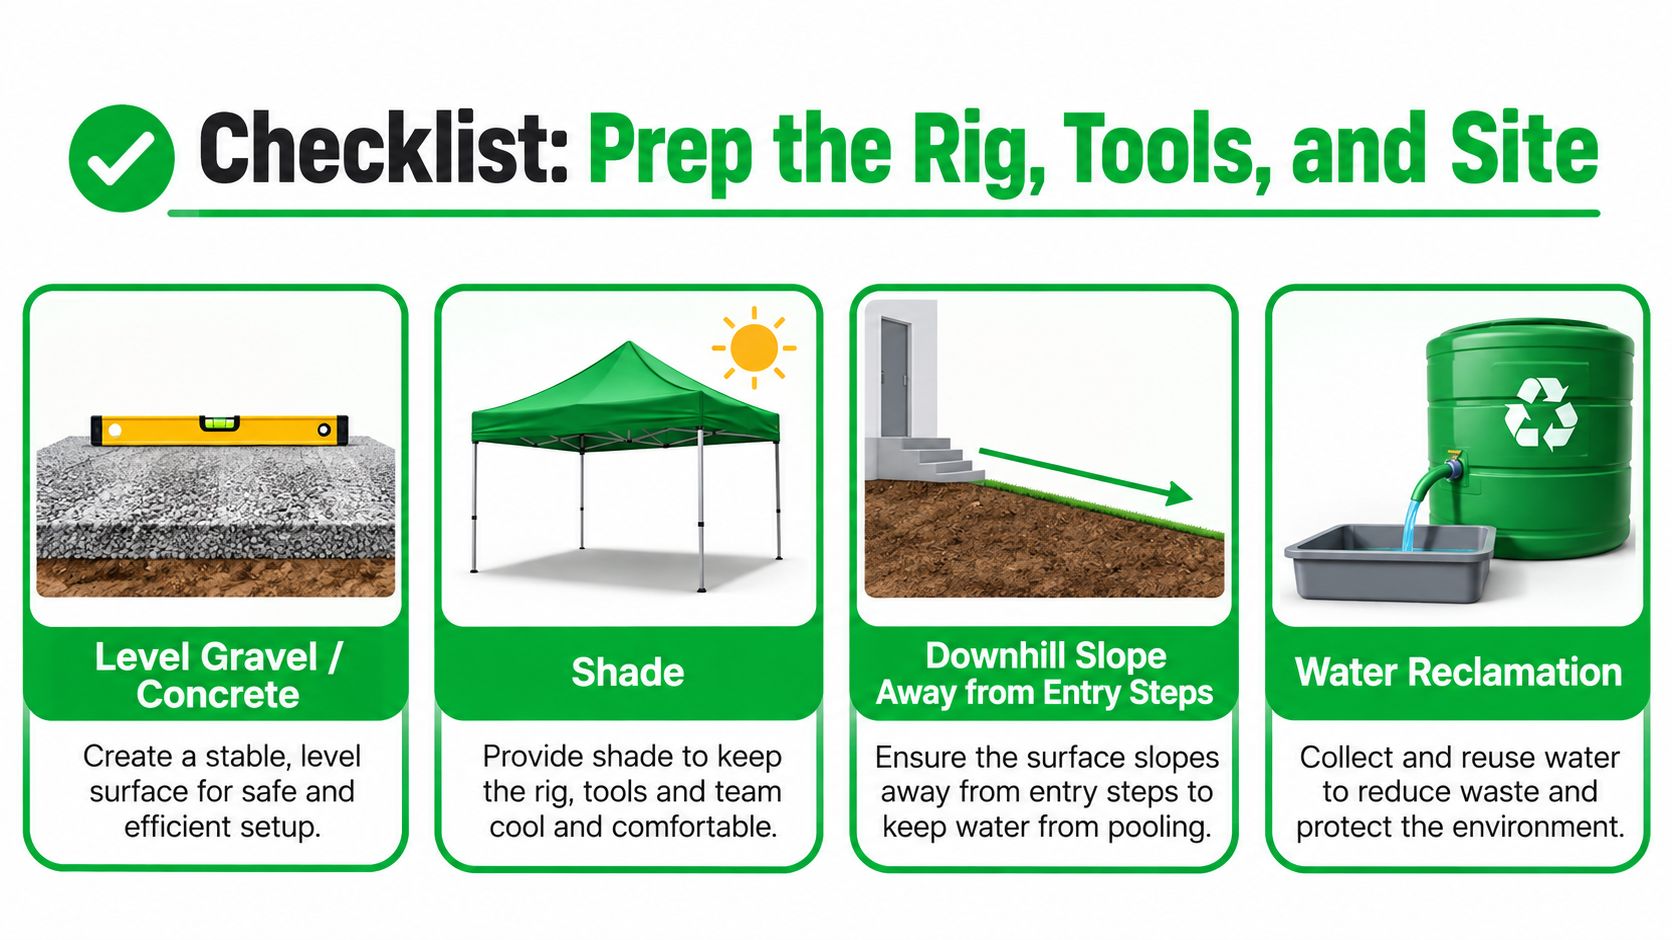
Choose level gravel or concrete when possible, with enough room to walk around the rig without dragging hoses across steps or landscaping. Shade is preferable, especially on large dark panels. A gentle downhill slope away from entry steps keeps runoff from pooling where people walk, and you should decide how wash water will be contained or redirected before opening the hose.
Build the equipment around the job
For a basic wash, gather two buckets with grit guards, a microfiber wash mitt, a chamois, a soft brush, and a hose with flow control. An upgraded setup may include a foam cannon, a telescoping brush, an RV-specific soap, and a 12V or electric pressure washer under 1,900 PSI. Professional work benefits from an extension ladder with a standoff, knee pads, and a rooftop walk pad.
Pressure is not a substitute for preparation. Manufacturer guidance favors mild cleaners, shade, cautious pressure, and a spray distance of about 16 inches or more from fiberglass surfaces. The low pressure wash tutorial is useful for understanding why controlled water flow is safer than blasting a large vehicle.
Before washing, move through this checklist:
- Seal the openings: Close windows, vents, doors, and exterior compartments.
- Protect vulnerable components: Cover refrigerator vents and AC shrouds with breathable cloth, not airtight plastic that can trap moisture.
- Secure the graphics: Tape cracked or lifting decals temporarily so water can't work beneath the edges.
- Clear the roofline: Remove the antenna if practical, and inspect the slide-out awning before extending it.
- Rinse loose grit: Use a gentle stream across the entire exterior before any mitt touches the finish.
A 4 to 5 foot working section keeps the rinse cycle close to the wash cycle, reducing residue accumulation. Product instructions commonly use a dilution of 1 ounce of cleaner per 1 gallon of water for foaming wash systems, but the product label and RV manufacturer guidance should take priority.
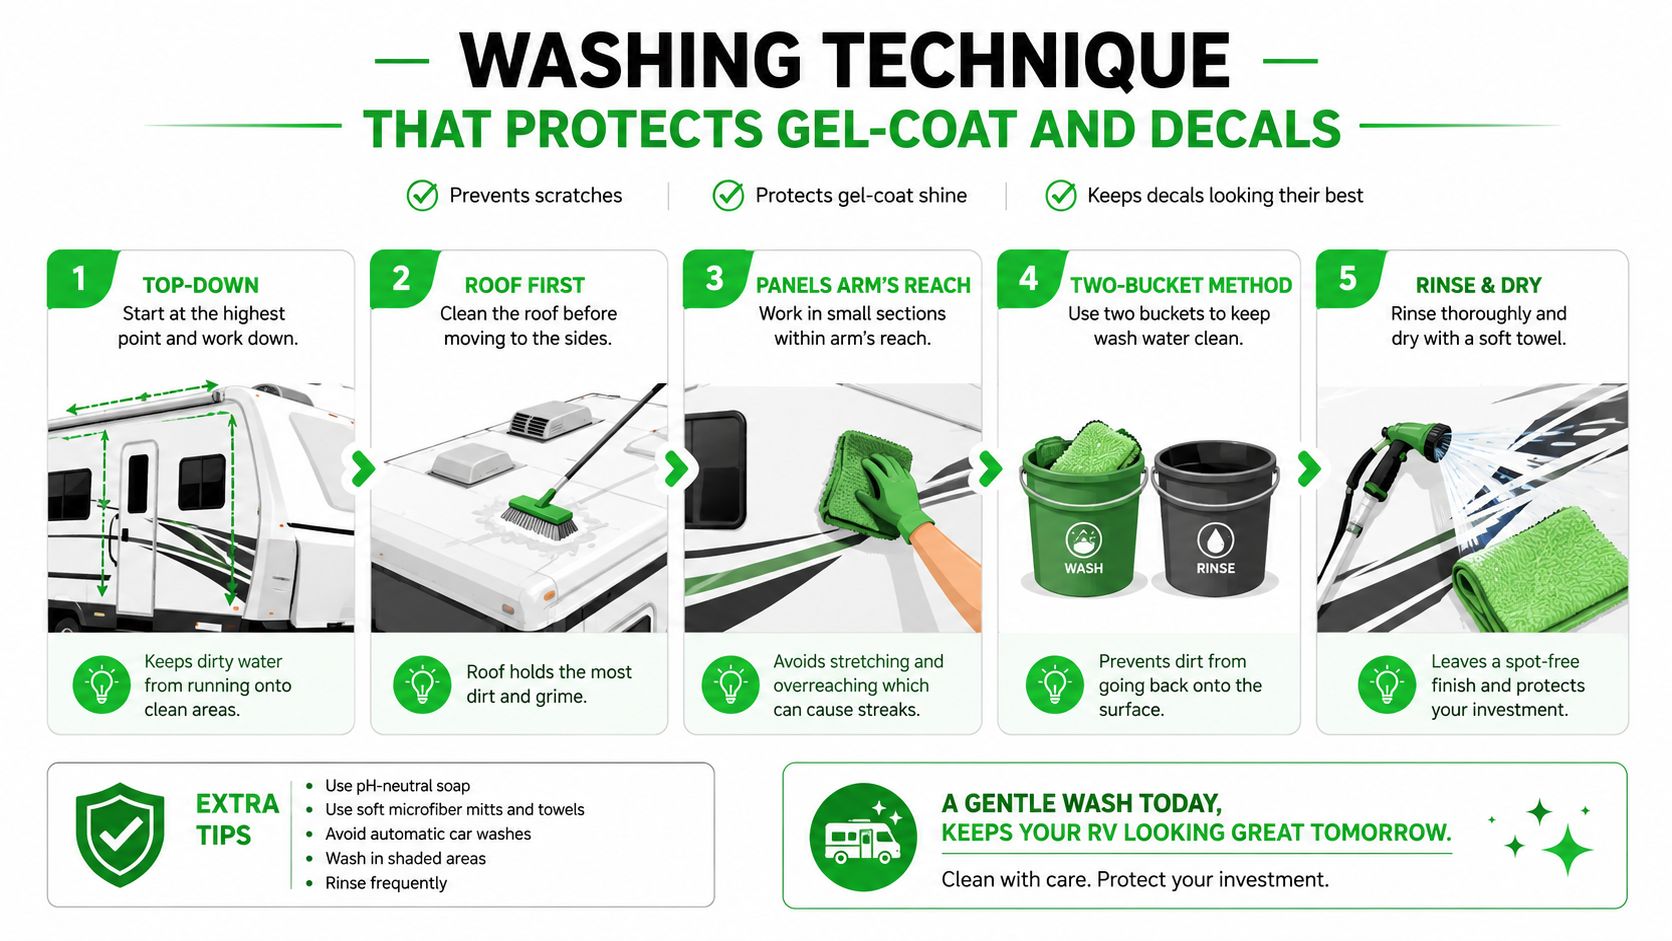
Washing Technique That Protects Gel-Coat and Decals
Start at the roof and work downward. That order lets dirty water move toward areas that haven't been cleaned yet, instead of running across finished panels after you've already dried them.
Rinse the roof and upper walls first, using the mildest effective flow to release dust and loose grit. Wash one section at a time, keeping the working area no wider than an arm's reach. Load the mitt with soap, make straight-line passes that follow the length of the panel, then rinse the mitt in the second bucket before collecting more soap.
Circular scrubbing is a poor choice on oxidized gel-coat because it can make scratches and haze harder to evaluate. The two-bucket method also matters because a dirty wash tool can carry abrasive particles from one panel to the next.
Control pressure around vulnerable areas
If you use a pressure washer, keep the spray 12 to 18 inches from the surface with a 40-degree nozzle. Never use a 0-degree or 15-degree tip on an RV exterior, and don't bring the spray closer than 12 inches to decals, seams, window gaskets, vents, or trim.
Manufacturer guidance warns against strong pressure, hot water, and direct sunlight. Cool to lukewarm water gives you more working time and is less likely to soften wax or leave streaks as the water evaporates in dry air. Rinse before soap dries, especially on the broad front cap and dark painted panels.
Surface discipline: The lower skirt, wheels, and undercarriage splash zones are last. Use a separate mitt for those areas because brake dust, oily road film, and grit don't belong anywhere near the upper body.
Dry immediately with a clean chamois, microfiber towel, or forced air. Flagstaff's mineral-rich water can leave spotting before you have time to inspect the panel, so don't let standing water evaporate on its own. A light mist of detail spray on glossy panels can help reveal streaks during the final inspection, but it shouldn't replace proper rinsing or drying.
For owners who want a broader exterior-maintenance reference, professional pressure washing guidance provides useful context on controlling water and protecting building surfaces.
A visual demonstration can help you judge spray angle, working distance, and rinse timing:
Tackling Black Streaks, Oxidation, and Bug Damage
Stains need diagnosis before scrubbing. Black streaks often collect below roof edges and trim, where dirty runoff dries in repeated lines. Start with a pH-balanced RV wash and a soft brush. Straight bleach is an aggressive shortcut on gel-coat, decals, and nearby sealants, and it can create more finish trouble than the streak itself.
Bug residue needs dwell time, not force. Pre-soak the front cap with a citrus-based cleaner approved for the surface, allow the residue to soften, and lift it with a microfiber mitt. Grinding dried insect proteins into paint or gel-coat creates fine marks that may only become visible after the panel dries.
Oxidation is a different problem. A chalky surface on older fiberglass usually needs a dedicated oxidation remover and controlled work with a rotary pad in shaded 2-foot sections, followed by a sealant. Washing alone won't restore oxidized gel-coat, and aggressive compounding can remove material unevenly if the operator doesn't monitor the finish.
Match the stain to the surface
| Problem | Best Cleaner | Tool | Caution |
|---|---|---|---|
| Black streaks | pH-balanced RV wash | Soft brush | Don't use straight bleach on gel-coat |
| Oxidation | Dedicated oxidation remover | Rotary pad | Work in shaded 2-foot sections and follow with sealant |
| Bug residue | Approved citrus-based cleaner | Microfiber mitt | Pre-soak before wiping |
| Mold on seals | Diluted hydrogen peroxide or a 50/50 white vinegar mix | Soft detailing brush | Keep runoff away from decals |
| Chrome trim | Chrome-safe polish | Appropriate polishing cloth | Avoid transferring polish to adjacent graphics |
| Painted panels | Surface-safe cleaner and clay-bar treatment | Clay bar | Lubricate the area and avoid dry rubbing |
| Rubber roof | Roof-compatible cleaner | Soft-bristle brush | Never use abrasive pads or solvents |
Window seals and roof edges deserve careful treatment when mold appears. Use diluted hydrogen peroxide or a 50/50 white vinegar mix, control the runoff, and rinse thoroughly without flooding decal edges.
Slide-outs add another inspection zone. Before extending or retracting one after cleaning, check the wiper seals, rollers, and lower edge for trapped grit. Camper slide-out care tips from Motor Sportsland offer helpful background for owners dealing with slide-out maintenance alongside exterior washing.
Finish with a top-down rinse and dry with a waffle-weave towel. Once the surface is dry, remaining spots are easier to identify and treat without mistaking leftover soap for permanent staining.
Roof and Awning Care by Material Type
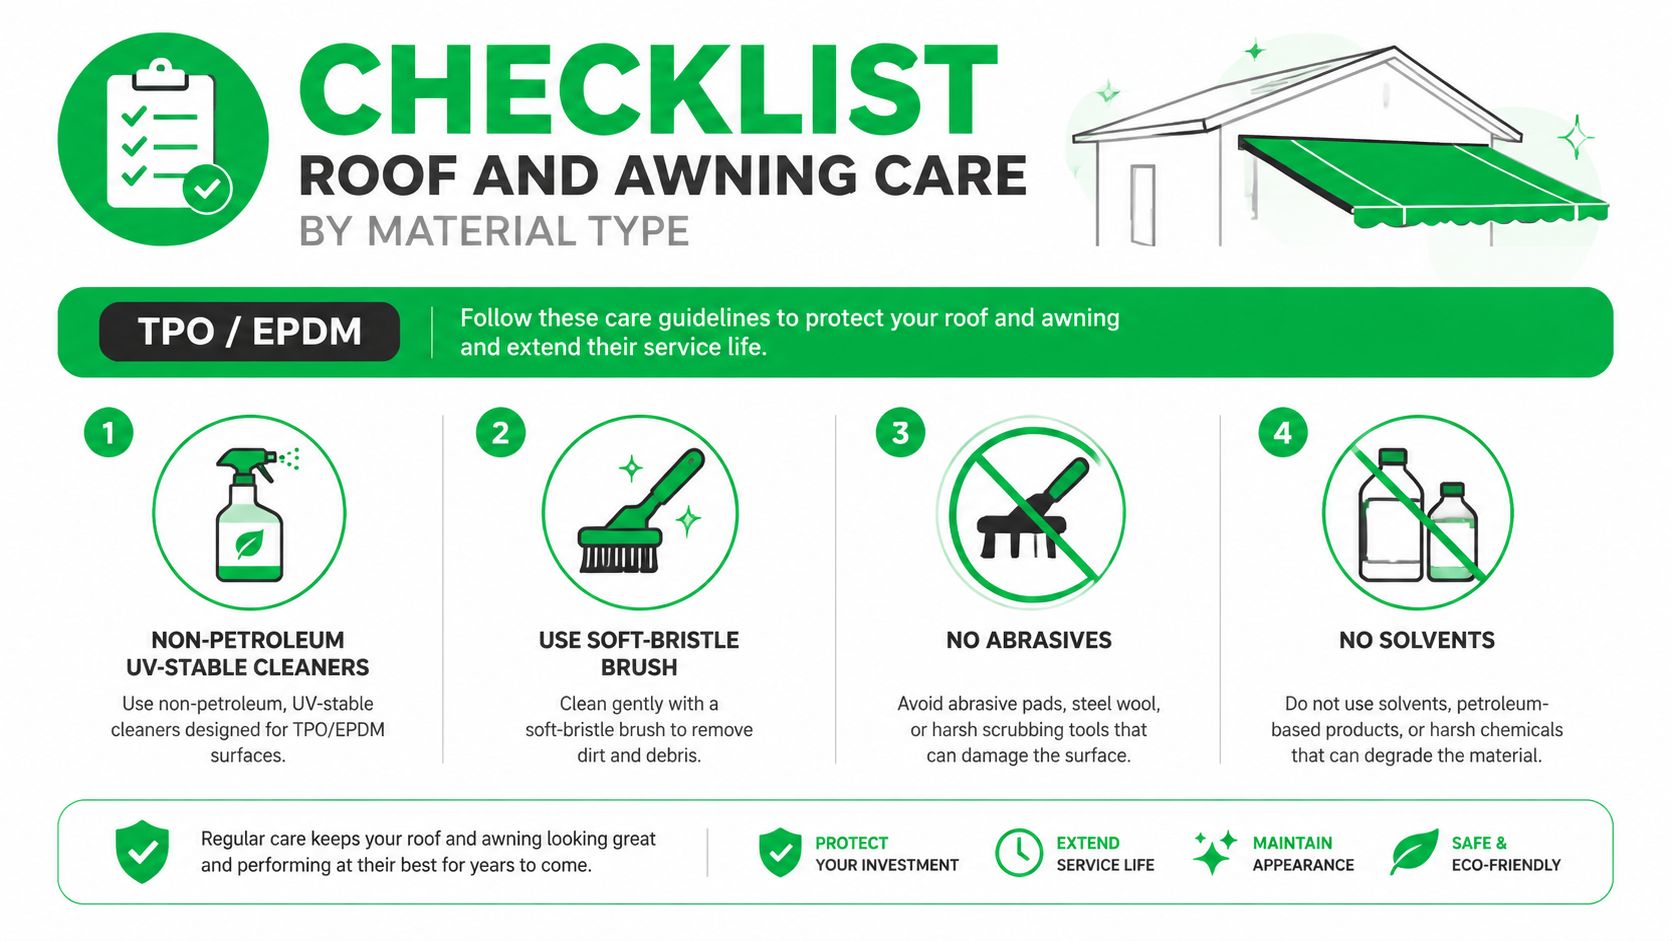
The roof material determines the cleaning chemistry. Find the RV documentation or identify the membrane before applying a product, because TPO, EPDM, fiberglass, and painted roof sections don't respond the same way.
TPO and EPDM rubber roofs need non-petroleum, UV-stable cleaners and a soft-bristle brush. Avoid abrasive pads, solvents, and petroleum-based products that can affect the membrane or stress seams. Fiberglass roofs tolerate more scrubbing, but pH-neutral or mild soap remains the safer starting point because the gel-coat still needs protection.
Roof access creates a separate hazard. Walk only on designated walk boards or load-bearing sections, wear soft-soled shoes, and don't assume a broad roof is safe to traverse. A second person should remain on the ground as a spotter, especially when the surface is wet or the roof layout is unfamiliar.
Clean the awning without forcing water inside
Brush loose debris from the awning while it's dry. Pine needles and pollen can turn into a muddy abrasive layer once wet, so removing them first saves the fabric from unnecessary scrubbing.
Extend the awning only after inspecting the arms, fabric, roller, and attachment points. Use mild soap and lukewarm water with a soft brush or wide spray pattern. A concentrated jet can force water beneath the fabric, stress stitching, and contribute to roller-tube problems.
Let the awning air-dry fully before retracting it. Trapping moisture inside the roll is an easy way to encourage mildew, especially after a shaded wash. For fabric protection, a product such as 303 Fabric Guard can be applied annually to help the awning resist pine pollen and strong sun, provided the material manufacturer allows it.
Roof cleaning and building-surface work share the same need for controlled access, compatible chemistry, and stable footing. The guidance on professional roof cleaning services is a useful reference for understanding why soft methods outperform indiscriminate pressure.
Sealing, Waxing, and UV Protection for High-Altitude Sun
Flagstaff sits above 6,900 feet, and UV exposure is a serious factor in gel-coat preservation. The combination of high-altitude sun, dry air, and pale dust can leave an unprotected finish chalky within a season, particularly on the front cap and the driver-side wall.
Protection starts only after washing and decontamination. Apply a polymer sealant or carnauba-paste wax made for RV finishes, working panel by panel in straight lines. Buff before the product flashes completely, because dried residue is harder to remove and can collect around decal edges, trim, and lights.
Sealants generally provide a longer protection interval than traditional wax, with common guidance placing sealant life at six to nine months and wax life at three to four months. Those figures come from the specified RV care guidance and depend on product, exposure, preparation, and storage conditions.
Choose the cadence that matches use
A stored rig can usually follow a simple seasonal pattern. Apply a substantial wax in spring, then use a polymer booster in fall before winter storage. A full-time traveler needs a more frequent routine, commonly planning quarterly applications, with extra attention to the forward-facing cap and the driver-side wall.
Decal edges and skylight frames deserve a close look before protection goes on. If a seam or decal edge is beginning to lift, don't bury the defect under wax. Address the underlying issue first, and use UV-stable seam tape where appropriate to slow moisture creep until a proper repair can be completed.
Wax isn't a repair product. It won't reverse oxidation, reattach a failing decal, or replace cracked sealant. It works best as the final layer after the surface is clean, dry, and structurally sound.
Flagstaff Maintenance Schedule and When to Call a Pro
A practical schedule follows exposure rather than a rigid calendar. Camping-season guidance commonly places exterior washing at 4 to 6 week intervals, while another manufacturer benchmark recommends washing at least monthly. During heavy dust, pollen, or long-distance travel, the right response is an earlier rinse and a closer inspection.
| Period | Storage rig | Weekend rig | Full-time traveler |
|---|---|---|---|
| Spring | Deep clean, inspect seals, apply protection | Wash after the first trips | Wash and inspect after each travel-heavy stretch |
| May pollen drop | Remove pine pollen before it bonds | Rinse roof edges, awning, and front cap | Use quick rinses between full washes |
| Summer | Check covered areas for trapped moisture | Full wash every 4 to 6 weeks | Maintain the same interval, adjusting for road grime |
| Monsoon dust | Rinse when dust layers build | Clean black streak runoff promptly | Wash before grit is worked into the finish |
| Before October freeze | Deep clean and inspect roof and seals | Prepare seams, awning, and compartments | Check sealant and drainage points |
| Winter storage | Clean, dry, and cover appropriately | Clean road residue before storage | Rinse road film and inspect after severe weather |
Roof and seal checks every 3 to 4 months are a recurring maintenance benchmark because exterior cleaning should also reveal water-entry risks. Ladder work requires judgment. The UK Health and Safety Executive says ladders should be strong, long enough, defect-free, and stabilized, preferably by tying them to a suitable point. Cornell's window-washing program prohibits the ladder method when the exterior window top exceeds 35 feet above the nearest ground or street surface, and requires someone at the foot of a ladder longer than 18 feet. California regulation limits ladder use to situations where safer approved methods aren't practical and prohibits a fully extended extension ladder beyond 40 feet. These rules concern window work, but they illustrate the same principle for RV access: don't improvise at height.
Power lines add another reason to stop and reassess. Guidance from J.Racenstein identifies a 10-foot minimum clearance for unqualified workers from power lines up to 50 kV and warns against water-fed poles near overhead lines because the pole and water stream can conduct electricity.
DIY is appropriate for routine grime when you have stable access, compatible products, and enough time to work in shade. Call a Flagstaff mobile detailer when chalky oxidation won't buff out, washing reveals seam separation, or black-streak runoff returns within a week of professional treatment. For owners comparing service approaches, a mobile hand-wash detailing service provides useful context on the difference between controlled hand work and a rushed rinse.
Keep this short checklist in the storage bay:
- Before washing: Identify roof and wall materials, close openings, inspect decals, and plan runoff.
- During washing: Rinse first, work top-down, use separate mitts, and keep soap from drying.
- After washing: Dry immediately, inspect seams and seals, and treat stains by surface type.
- Before storage: Clean the roof and awning, let fabrics dry, protect the finish, and check for water-entry points.
- Before travel: Confirm that decals, slide-out seals, awning hardware, vents, and exterior lights are secure.
For broader property upkeep around seasonal weather, this seasonal home maintenance checklist can help you coordinate exterior inspections beyond the RV itself.
Pine Country Window Cleaning has served Flagstaff and Northern Arizona since 1999, with safety-trained technicians and equipment suited to difficult exterior access. For careful pressure washing, roof and exterior maintenance, and dependable service that respects your home and property, visit Pine Country Window Cleaning to request a free estimate or schedule service.