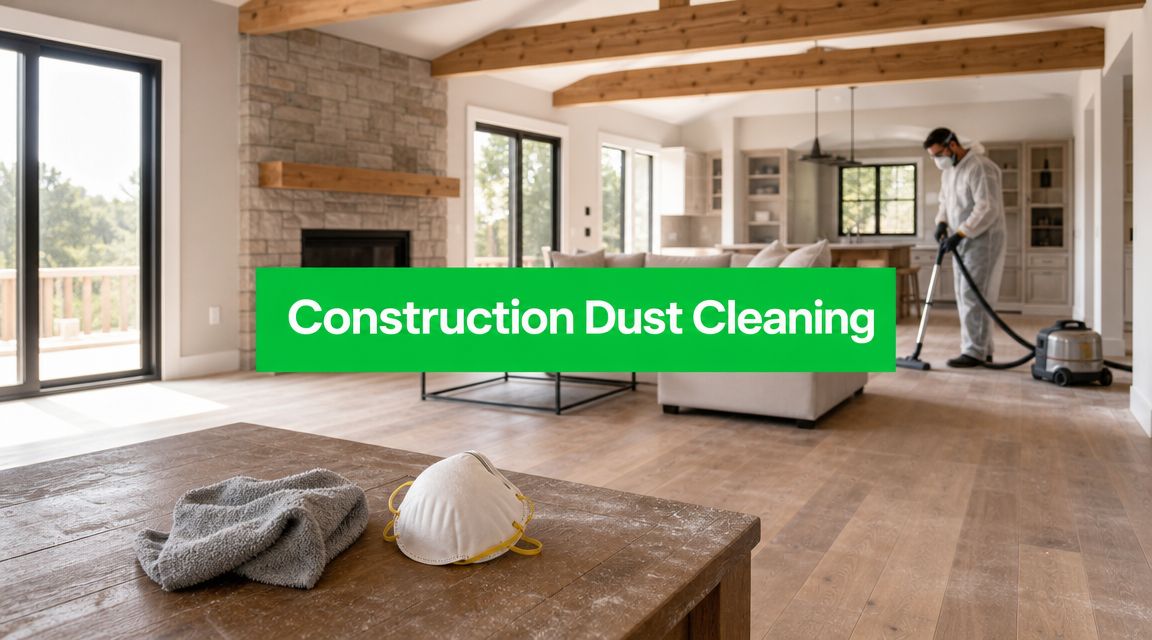
You finished the remodel. The painter is gone, the trim looks sharp, and the new floors are finally in. Then the sun hits the room at the right angle and you see it. Dust on the baseboards, dust on the window sills, dust packed into the screen tracks, and a fine gritty film on surfaces you already wiped once.
That's the part people underestimate. Construction dust cleaning isn't normal house cleaning with a little extra effort. It's a different job entirely. The dust is finer, more abrasive, and more stubborn. It gets into vents, settles on ledges, clings to screens, and keeps drifting back down after you think you're done.
In Flagstaff, that frustration gets amplified. High-altitude light shows every streak on glass. Dry air helps fine dust stay active longer. New builds in places like Forest Highlands, Pine Canyon, and Flagstaff Ranch often have a long punch-list phase where multiple trades keep walking in and out, which means the dust problem can drag on right to the end.
Since 1999, we've seen the same pattern over and over. The space looks close to finished, but it doesn't feel livable yet. That last layer of cleanup is what makes the difference between “construction complete” and “ready to move in.”
The Aftermath of Renovation Dust
You step into the finished room, the cabinets are in, the paint has cured, and the floor looks clean from ten feet away. Then the afternoon sun hits the glass in a Flagstaff home and the truth shows up all at once. Fine powder on the sills, grit in the tracks, haze on the windows, and a film on every flat surface that somehow came back overnight.
That dust is not just a housekeeping nuisance. It is a mix of drywall powder, sawdust, insulation fibers, concrete residue, paint overspray, and jobsite dirt tracked in during the final stretch. In higher-end homes around Forest Highlands and similar new-build areas, it also settles into wood grain, textured stone, beams, vent covers, and deep trim profiles that hold onto debris long after the crew leaves.
The reason homeowners get stuck is simple. Post-construction dust keeps circulating. Open a door, switch on the HVAC, pull a blind, or walk across the room, and fine particles lift back into the air and settle somewhere else. A room can look finished and still be breathing dirty.
That is why the cleanup has to be health-first. Surface wiping matters, but hidden dust in supply vents, return grilles, fan housings, and window tracks keeps the problem alive. If you are trying to understand why dust stays airborne after a remodel, Can Do Duct Cleaning's guide gives a useful explanation of the airflow side.
I have seen the same mistake since 1999. People wipe counters first, then chase residue for days because the high dust is still sitting on ledges, tops of doors, light fixtures, and inside the HVAC system.
Windows deserve special attention here. Construction dust is abrasive, and careless cleanup can scratch glass, damage screens, and grind debris into tracks and frames. That is one reason many homeowners bring in a team that handles post-construction cleaning services as the final pass, after the trades are done and before move-in. In Flagstaff's strong light, every missed smear and every dusty edge shows.
Preparing for Your Post-Construction Clean
A post-construction clean starts before you open the vacuum closet. In Flagstaff, I tell homeowners to wait until the last sanding pass is done, the painters are out, and the foot traffic has dropped off. If crews are still trimming doors or hauling material through the house, fine dust will keep spreading into finished rooms, especially in larger homes with multiple entries and long hallways.
Preparation is what keeps a one-day cleanup from turning into a week of chasing dust.
Get the right tools first
The dust left after a remodel is not all the same. Around here, it is usually a mix of drywall powder, sawdust, insulation fibers, grout haze, concrete residue, and outdoor soil tracked in from the jobsite. In high-altitude homes, dry air helps that fine material stay loose longer, which means cheap tools often just stir it up and move it around.
Use gear that captures dust instead of redistributing it:
- HEPA vacuum: Fine construction dust slips right through many standard vacuums and ends up back in the air.
- Microfiber cloths and flat mop pads: They hold dust better than cotton rags and leave less lint behind.
- Extension pole with the right attachments: Needed for beams, high trim, stair ledges, fan housings, and plant shelves common in custom homes.
- Gloves, eye protection, and a properly fitted dust mask: Drywall and insulation dust are hard on eyes, skin, and lungs.
- Plastic sheeting and painter's tape: Helpful for closing off finished spaces if another area of the house is still under construction.
- A clean HVAC filter: Install one before cleanup starts, then check it again after the dust work is finished.
If you want a planning reference before you tackle post-construction dust and debris, use a checklist and stage your supplies in the room you are cleaning. Walking back and forth through the house with dirty shoes and dusty tools creates extra work fast.
Contain the dust before you chase it
Contain first. Clean second.
If the remodel only affected one wing, one bathroom, or one kitchen, close that area off and keep the rest of the house protected. Soft furniture, bedding, rugs, and clean clothes pick up dust quickly, and once that powder gets into fabric, the job gets bigger than it needed to be.
A few field rules save a lot of frustration:
- Wait for cutting, sanding, and texture work to be fully finished: Cleaning too early wastes time.
- Set one entry route for workers and cleanup crews: Fewer travel paths mean less spread.
- Separate debris removal tools from fine-dust tools: A vacuum used for nails, chunks of drywall, and saw scraps is not the one you want on finished surfaces.
- Bag trash as you go: Piles of debris keep breaking down into smaller particles.
- Protect window glass and tracks until final cleanup: Construction grit scratches easily, especially when someone wipes it dry.
In homes around Forest Highlands and other custom-build areas, windows, ledges, and HVAC returns usually need a more careful final pass than homeowners expect. That is why many people hand off the finishing stage to post-construction cleaning services once the trades are fully done. It is often the safest way to get the house move-in ready, especially when air quality and scratch-free glass matter as much as appearance.
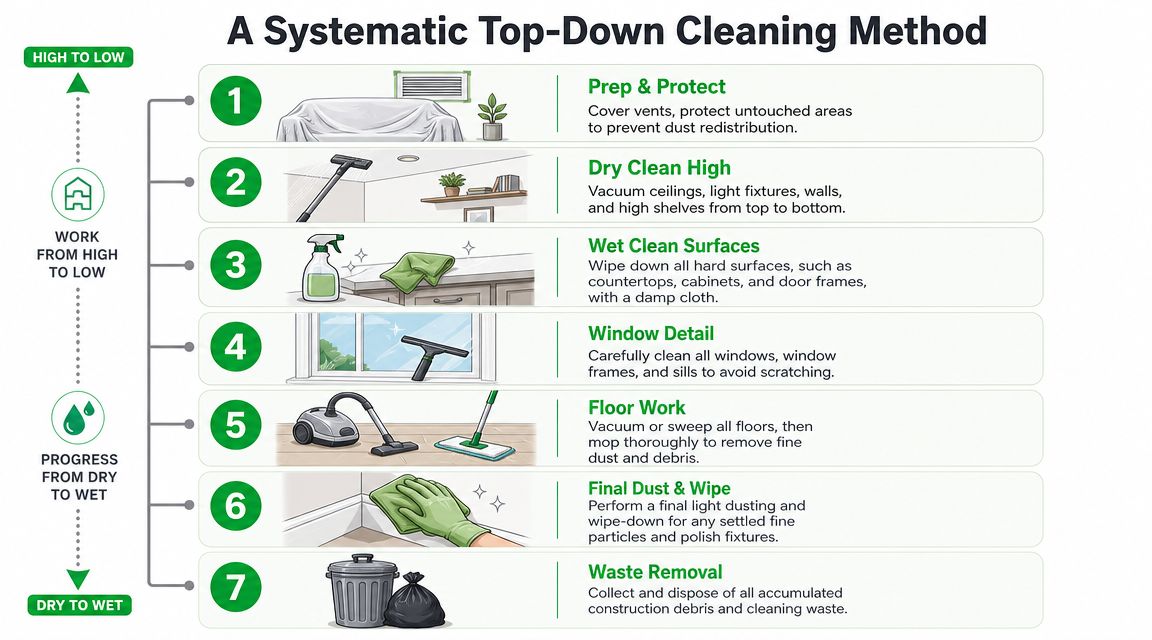
A Systematic Top-Down Cleaning Method
Most failed construction dust cleaning jobs fail for one reason. The order is wrong. If you clean floors first and high surfaces later, you've guaranteed yourself extra work.
A reliable field workflow is a 3-stage sequence: a light initial dust removal, then a HEPA-filter vacuum pass, then a damp microfiber wipe of surfaces. That order is used for contamination control and to reduce the re-aerosolization of fine dust (3-stage post-construction dust workflow).
This visual shows the logic of the process from high to low.
Start high and stay dry at first
Begin with ceilings, corners, fan housings, light fixtures, tops of cabinets, door frames, and upper trim. Use controlled dry removal first. That might mean a light sweep with an electrostatic duster or a HEPA vacuum attachment on high surfaces.
The goal here isn't polishing. It's knocking loose and capturing dust from the highest settling points before you move lower.
A few places get missed constantly in custom homes and cabins:
- Beam tops and ledges
- Recessed can light trims
- Window headers and deep sills
- Closet shelves
- Cabinet crown details
- Return air grilles and vent faces
If you skip those, the room won't stay clean.
Move into the body of the room
Once the high areas are handled, work downward through walls, trim, shelving, counters, doors, and cabinetry. When cleaning these surfaces, people often over-wet the job. Don't soak dusty surfaces right away. Use a controlled vacuum pass where needed, then damp microfiber to lift what remains.
The difference between “damp” and “wet” matters. A soaked cloth pushes mud into corners and joints. A lightly damp microfiber cloth picks up residue without making a slurry.
Dust that looks harmless on a painted sill can act like sandpaper when you scrub too hard.
This is also the point where you need to pay attention to hidden settling zones. Corners, trims, cabinetry edges, and window tracks catch a surprising amount of fine material. Good cleaning isn't only what you see straight on. It's what you check with your hand and flashlight afterward.
Here's a practical room sequence that works well:
| Area | First pass | Follow-up |
|---|---|---|
| Ceiling and high trim | Light dry dust removal | HEPA detail as needed |
| Walls and doors | Spot vacuuming where dusty | Damp microfiber wipe |
| Counters and shelves | HEPA vacuum edges and seams | Damp microfiber finish |
| Cabinets inside and out | Remove loose dust first | Wipe shelves, fronts, pulls |
| Baseboards and lower trim | HEPA vacuum | Damp wipe |
A short walkthrough can help before the floor stage. Stand in the doorway and check for any visible haze on dark surfaces, horizontal trim, and light fixtures. If those still look chalky, fix them now. Floors are last for a reason.
Later in the process, this video gives a useful visual of post-construction cleaning in action.
Finish with floors and a second look
Floors carry the heaviest load, but they should be your final major task. Vacuum thoroughly first. Then do a second pass if the first one pulled more than you expected. On hard surfaces, follow with a damp mop once the loose grit is gone.
That two-part finish matters in Northern Arizona homes. Fine dust on hard floors doesn't just look bad. It gets tracked into adjacent rooms, caught in area rugs, and ground into stair treads.
A few habits make the final pass better:
- Vacuum edges and corners slowly: Fine debris hides where floor and wall meet.
- Check under appliances and behind toilets: Dust piles up where air movement is weak.
- Clean your vacuum filters right after the job: A loaded filter cuts performance and spreads mess.
- Seal used cloths or pads for disposal or laundering: Don't leave dusty materials sitting open indoors.
Construction dust cleaning is one of those jobs where patience beats speed. If you rush the order, the house keeps telling on you for days.
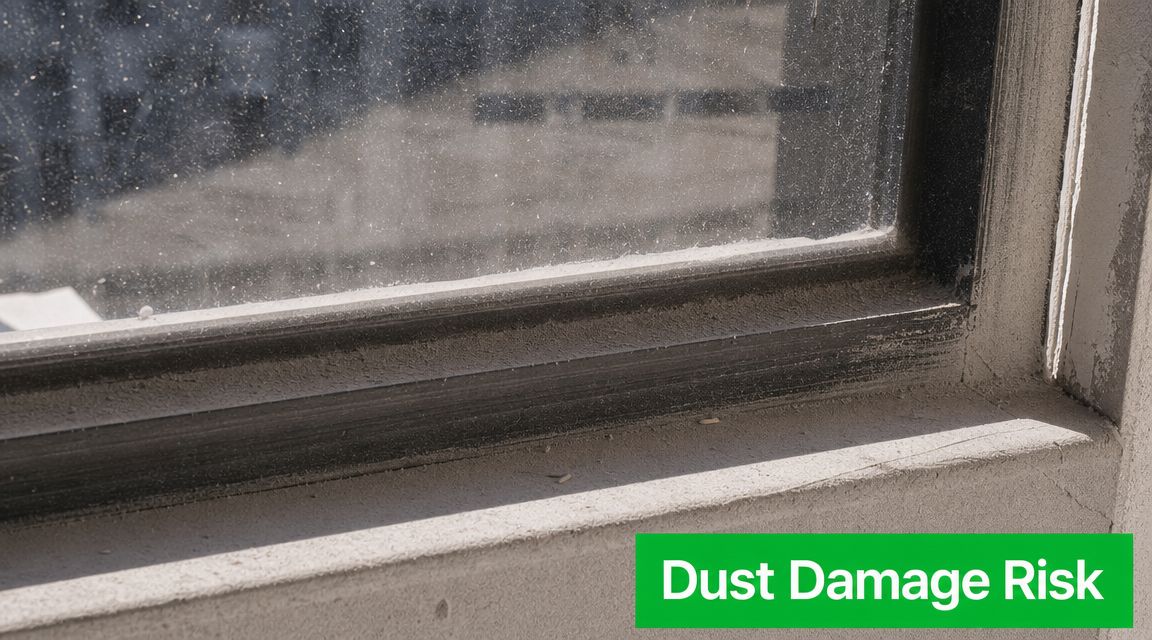
Why Window Cleaning Is a Specialist's Job
Windows are where a lot of DIY cleanup goes sideways. The room is nearly done, the light is pouring in, and somebody grabs whatever cloth is nearby to wipe the glass. That's when grit gets dragged across the surface and the damage is done.
Professional guidance is clear on the risk. Fine drywall dust, caulk residue, and paint overspray can permanently mar glass or low-e coatings if the wrong abrasive cleaners or pads are used. The same guidance notes that post-construction window cleaning often needs repeated dust removal and specialized tools to avoid streaks and damage (post-construction window cleaning risks and methods).
The sill and track are part of the glass job
A window doesn't clean up properly if the sill, screen, and track are still loaded with grit. Every time you open or close the unit, that material shifts back onto the frame and glass.
That's why sill work matters more than people think. If you want a good outside reference on the detail side of that issue, this article on professional window sill cleaning by Water Works is worth a read. It gets into the buildup problem that keeps windows looking dirty even after the pane itself is touched up.
What professional window crews do differently
In post-construction conditions, the method matters as much as the effort. We don't clean windows with a rag, spray bottle, or improvised household tricks. That's not how you protect glass after a build.
The professional approach looks more like this:
- Screens come out first: They need to be cleaned separately, not brushed off in place.
- Tracks are vacuumed before detail work starts: Loose grit has to be removed before wet cleaning.
- Frames and sills get attention before final glass work: Otherwise dust drips and re-soils the pane.
- Glass is cleaned with professional squeegees, poles, and pure-water brushes where appropriate: That gives a controlled result without dragging debris around.
That sequence protects the surface and gives a cleaner finish. It also shows respect for the home. When crews remove screens carefully, clean them, and reinstall them correctly, the entire window system looks finished instead of half-done.
For homeowners comparing options, window cleaning services are one way to handle the glass, screens, tracks, and final detail work after dust cleanup is mostly complete.
A post-construction window isn't “just dusty.” It may have grit, adhesive residue, paint specks, and screen debris on the same opening.
Don't Forget Your HVAC System and Air Quality
A house can look clean and still blow dust back into the rooms the first time the system turns on. That's why HVAC attention belongs in any serious construction dust cleaning plan.
Construction dust can contain respirable crystalline silica, which is a known lung hazard. Guidance on post-construction cleanup also warns that spaces can look clean while fine particles remain in HVAC systems, and it points to HEPA-filter vacuuming as a core recommendation because ordinary methods may re-aerosolize dust instead of removing it (construction dust, silica, and HVAC cleanup guidance).
What homeowners can safely do
You don't need to tear into ductwork to make a meaningful improvement. A few safe steps go a long way:
- Vacuum supply and return vent covers carefully: Use a brush attachment and don't grind grit into painted surfaces.
- Wipe around registers and nearby trim: Dust collects where air movement changes direction.
- Replace the furnace or air-handler filter once dusty work is done: Don't keep running a filter that already caught construction debris.
- Check for visible dust inside accessible vent openings: If buildup is heavy, stop there and call a duct professional.
This is one of the most overlooked handoff items after a remodel. The carpentry may be done and the painter may be finished, but if the air system is still feeding fine dust into the rooms, the house won't feel settled.
When to call an HVAC or duct specialist
Call for help if dust is clearly sitting inside the duct runs, if the filter loads up unusually fast right after the project, or if occupants are sensitive to airborne irritants. That's especially important in homes with kids, older adults, or anyone with respiratory concerns.
Air quality isn't separate from housekeeping after construction. It is the job.
If the project also involved neglected exhaust systems, why dryer vent cleaning is important is another practical issue to address while you're already finishing the home.
When to Hire a Professional Cleaning Service
A lot of homeowners hit the same wall after a remodel. The contractor is gone, the room looks finished from ten feet away, and the house still feels dusty. You wipe once, then see more residue on dark floors, window sills, and trim by afternoon.
That is usually the point where a professional crew makes sense.
Post-construction cleanup takes time, proper filtration, and a method that protects new finishes instead of grinding debris into them. Fine drywall dust, sawdust, grout haze, paint specks, silicone residue, and red-brown outdoor grit from Flagstaff job sites all behave differently. In higher-elevation homes, dry air and active HVAC systems can keep that dust circulating longer than people expect, especially in larger custom homes and recent builds around Forest Highlands.
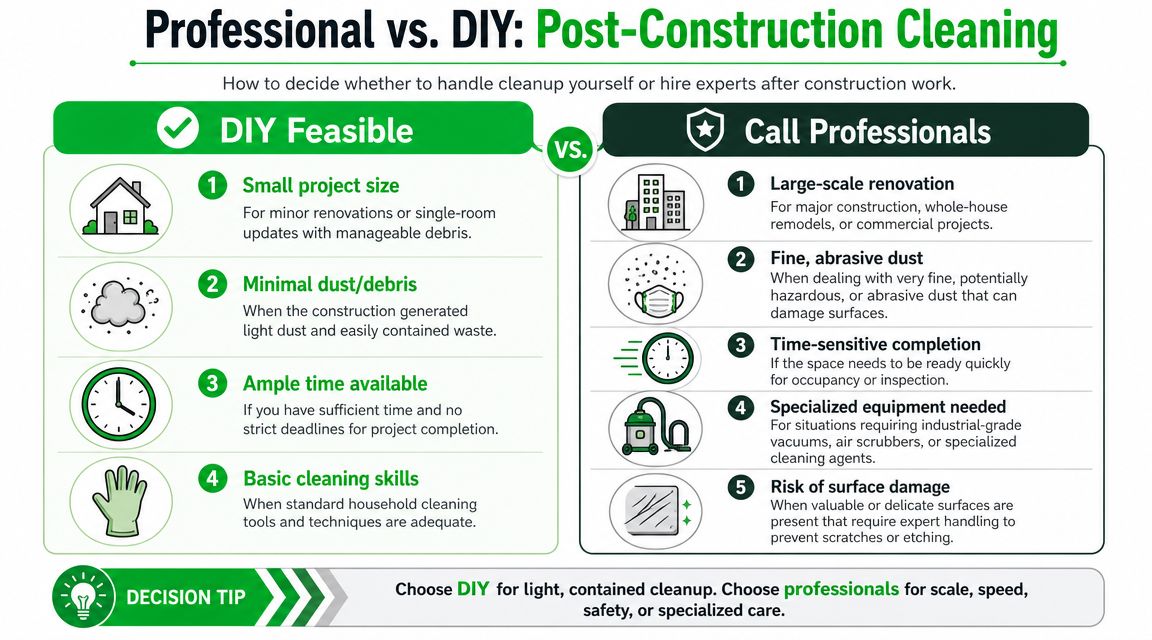
Good candidates for DIY
DIY can work well when the scope stayed small and the materials are forgiving.
- A single-room remodel: Dust stayed fairly contained and cleanup paths are simple.
- No delicate glass, natural stone, or specialty finishes: There is less risk of scratching or chemical damage.
- You already own the right tools: A true HEPA vacuum, microfiber, extension tools, and safe glass-cleaning supplies.
- You have time for repeat passes: One round rarely gets everything after construction.
Signs it's time to call in a crew
Some jobs stop being practical for a homeowner very quickly.
- Dust has spread well beyond the work area
- Move-in, listing photos, or reopening is close
- You have tall glass, screens, ledges, beams, or hard-to-reach detail work
- Someone in the home is sensitive to airborne dust
- You still see haze on glass, grit in tracks, or residue on finished wood and trim after cleaning
A good company should be able to answer direct questions before they ever step through the door.
| Ask this | Why it matters |
|---|---|
| Do you handle post-construction cleanup regularly | This work calls for different tools, sequencing, and residue removal than standard house cleaning |
| What equipment do you use for fine dust | HEPA filtration helps keep dust from being blown back into the room |
| How do you clean glass, frames, and finished surfaces | New materials scratch easily if debris is dragged across them |
| Are you insured and used to working in occupied homes | Finished homes need careful movement, floor protection, and clear communication |
| Do you clean screens, tracks, vents, ledges, and cabinets | Those areas are often the reason a house still feels dirty after a basic pass |
In Flagstaff, local experience shows up in the details. Crews who work here regularly know what mountain dust does to tracks and screens, how wood interiors in custom homes hold fine powder in corners and grain, and why large windows need careful post-construction cleaning to avoid scratches. They also understand the health side of the job. If dust is still sitting in hidden ledges, vent areas, and window channels, the home is not really ready to settle into.
For many homeowners, hiring help is the cleanest finish to the project. It saves wear on new surfaces, gets the hidden debris a basic cleanup misses, and leaves you with a home that feels safe to live in, not just finished to look at.
Your Final Inspection Checklist
Even a good cleaning job needs a final walk-through. Dust likes edges, tops, seams, and spots you don't see until the light changes.
Use your eyes, but also use your hand. Run a fingertip across the top of a door frame, the back edge of a window sill, and the upper face of baseboards. Open a cabinet. Look into corners. Check vent covers. If the surface feels gritty, the job isn't finished yet.
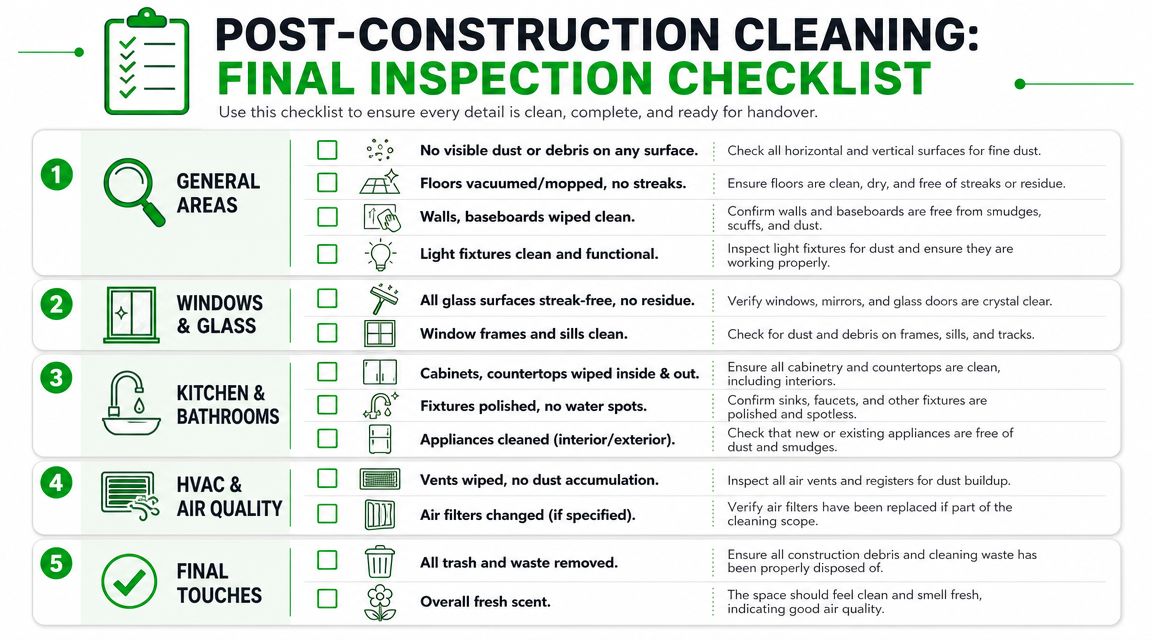
Final walk-through points
- High touchpoints: Door frames, switches, cabinet pulls, and handrails should feel clean, not chalky.
- Inside storage areas: Cabinets, drawers, shelves, and closets often hold dust long after open surfaces look fine.
- Lower trim and corners: Baseboards, floor edges, and stair nosings catch what settles last.
- Window zones: Glass, sills, tracks, frames, and screens should all be free of residue.
- Air side details: Vent covers should be clean, and the system shouldn't puff visible dust when it starts.
Clean doesn't just mean the room photographs well. It means you can move in, turn on the air, open the windows, and stop thinking about dust.
If you're staring at a finished remodel that still feels dirty, Pine Country Window Cleaning can help with the final stage that makes the home feel ready again. We've served Flagstaff since 1999, and we handle post-construction window cleaning with the right tools for glass, screens, tracks, and detailed finish work while treating your home with care.